e-conomic: Import Customer Orders

Features
- Automatically Import customer sales orders into e-conomic reducing manual data entry and improving order processing efficiency.
- Import customer sales orders using various multiple gateways, including SFTP, FTP, From HubBroker Network, IMAP, API and Post Receiver.
- Data mapping and validation before importing orders.
- Configure notification settings, including positive and negative email notifications for app users.
- Schedule order imports on a daily, weekly, or hourly basis.
- Share adaptors with other users within your subscription with advanced security controls.
- Monitor order processing statuses and identify errors to simplify troubleshooting and corrective actions.
Configuration flow
Procedure to activate Adaptor e-conomic: Import Customer Orders
Navigate to Adaptors -> Catalogue, there you can find multiple Adaptors which you can use for business purpose
Click on 'Activate', Adaptor e-conomic: Import Customer Orders will be activated in your account

After activation of Adaptor it will navigate to 'General' screen of Adaptor
Procedure to configure Adaptor e-conomic: Import Customer Orders
In General you can manage different settings described in below (General) image

The General tab allows users to configure the basic settings of an adaptor, including its name, description, email configuration, execution status, execution mode, sharing permissions, and security settings.
The following settings are highlighted in the image:
Configure SMTP: Select the default HubBroker email address or an available IMAP/SMTP account. Notification emails and files sent through the destination email gateway will use the selected email configuration.
Status (Active / Inactive): Control whether the adaptor is enabled or disabled.
- Active: The adaptor is enabled and can execute according to its configured schedule (every hour in the illustrated example).
- Inactive: The adaptor is disabled and will not execute.
Execution Mode (Production / Testing): Select how the adaptor processes documents. Production mode is used for normal processing, while Testing mode follows the configured testing behavior, including whether files are sent to their original or processed destinations.
Learn more about sharing and security - Click here
Click on 'Source' to connect source gateways to import the orders into e-conomic account
You can select any gateway from existing gateway or you can create new gateway of below different types:
- FTP
- SFTP
- API
- Imap
- From HubBroker Network
- Post Receiver
You can select multiple gateways as a source gateway.
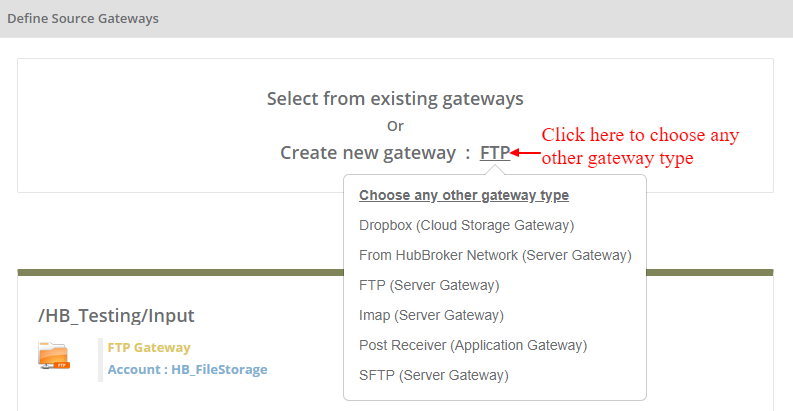
You can create new gateway by clicking on 'Create new gateway'

You can select any gateway as a source from existing gateways by clicking on 'Select from existing gateways', and it will display all the existing gateways and you can choose any gateway.
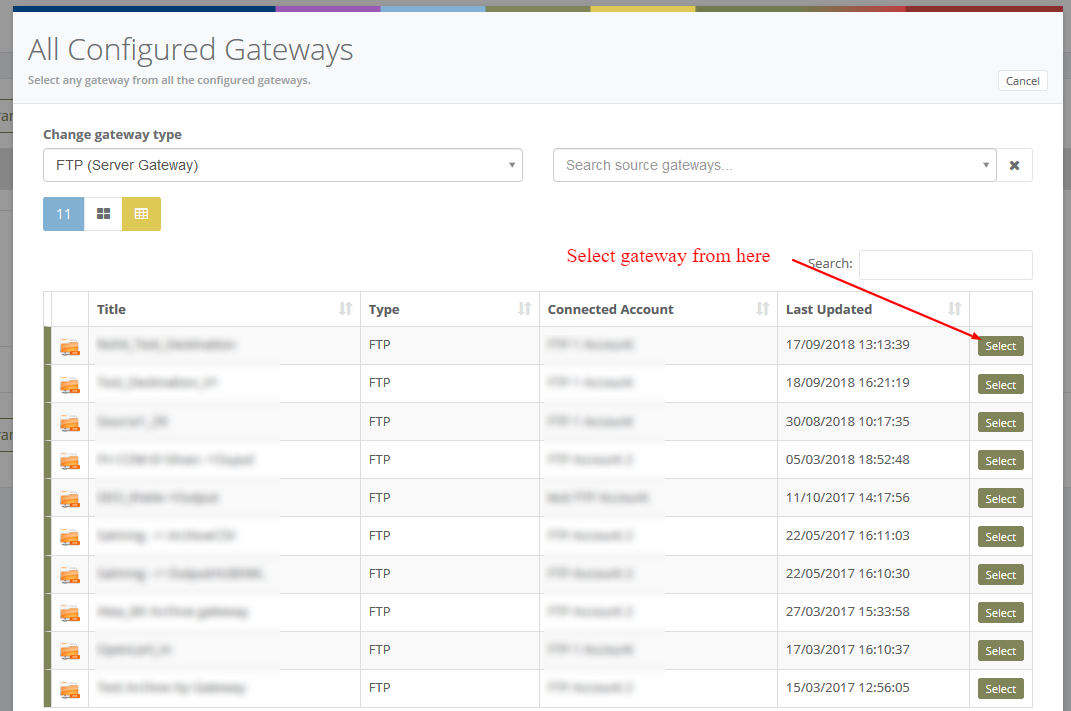
When you clicked on selected gateway type (For Ex: FTP)then below image will be displayed and you can choose any other gateway as a source for input
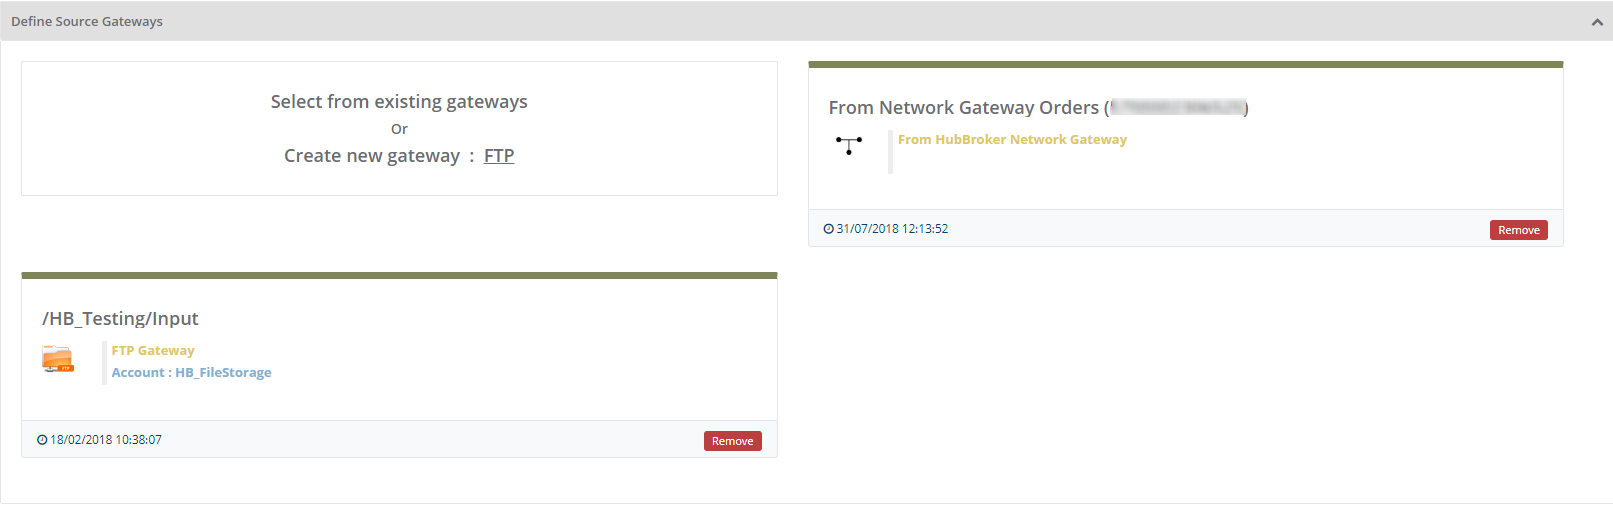
After selection of source gateway, it will be displayed like below:
Click on 'Destination' to connect e-conomic account in destination, and orders will be imported into e-conomic account once it is configured
Step by step connection of e-conomic account to iPaaS is shown in below images.
Click on ' + ' to connect new e-conomic account.
After Click on ' + ' OR Click on via the email if you received any connection link you will redirect to the below screen and choose any company and it will fetch company details you will redirect to below screen and click on 'OK' button.
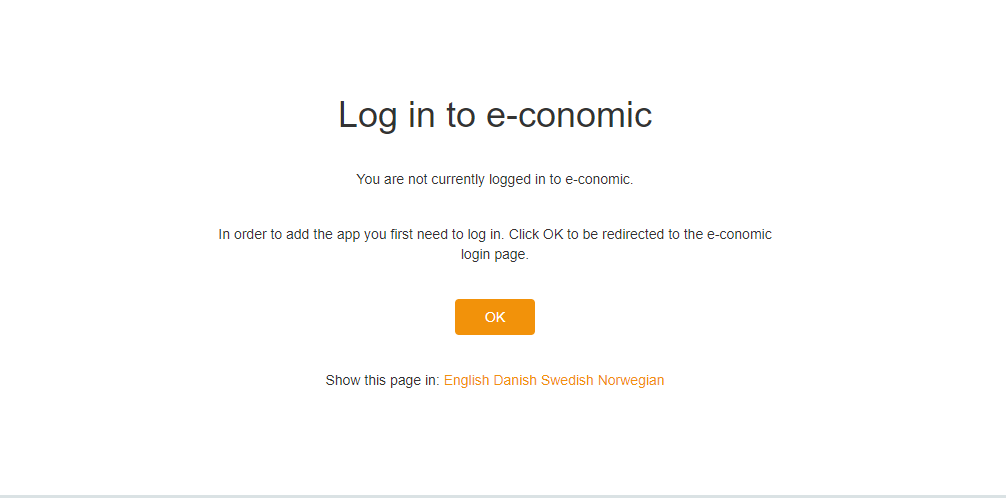
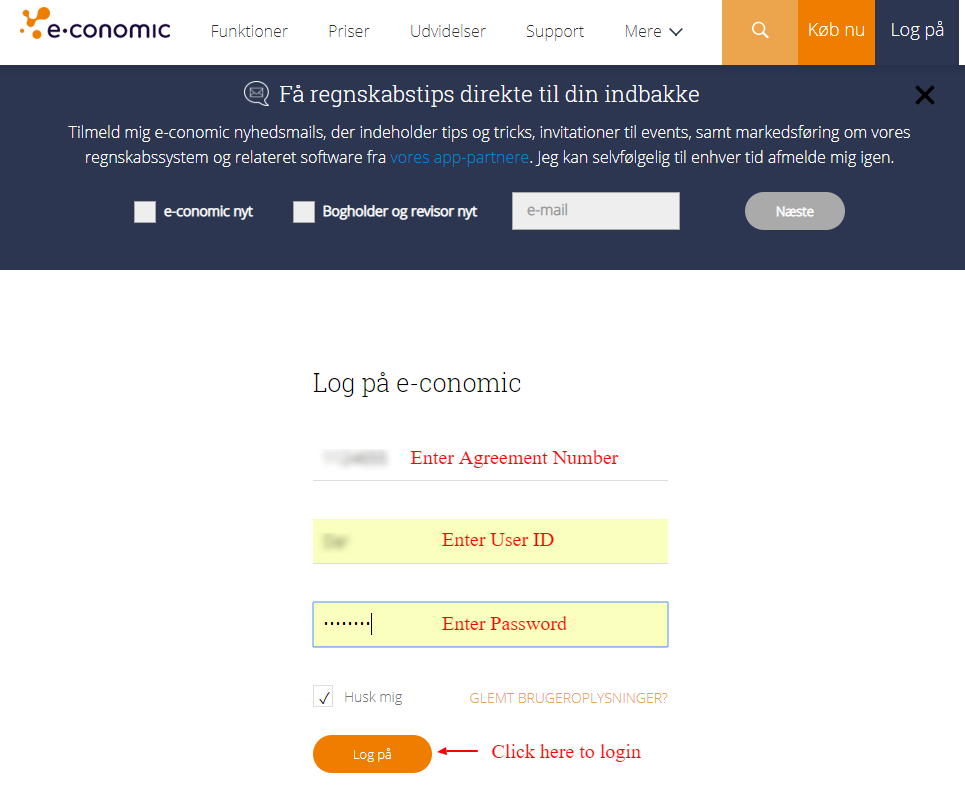
Provide e-conomic agreement number,user id and password and click to 'Sign in'.
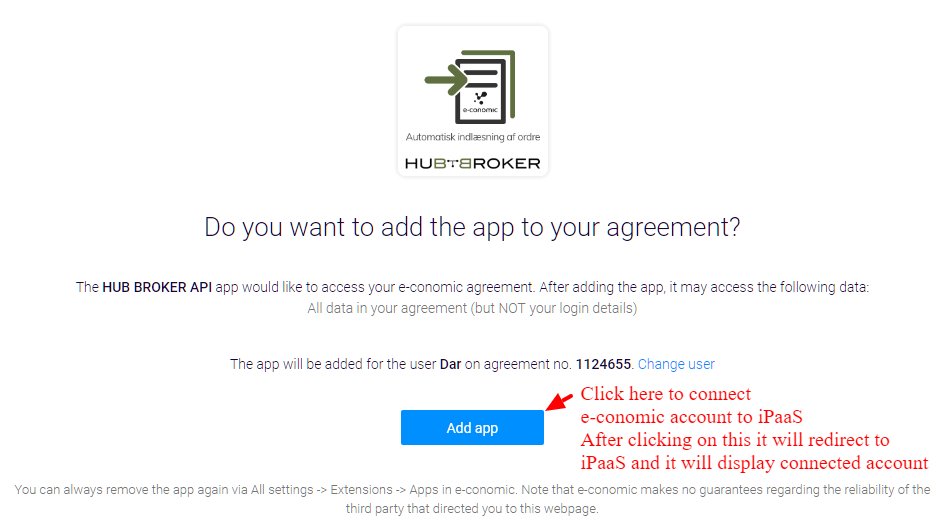
After click on 'Sign in' you will navigate to below screen and click on 'Add app' button to connect e-conomic account to iPaaS.
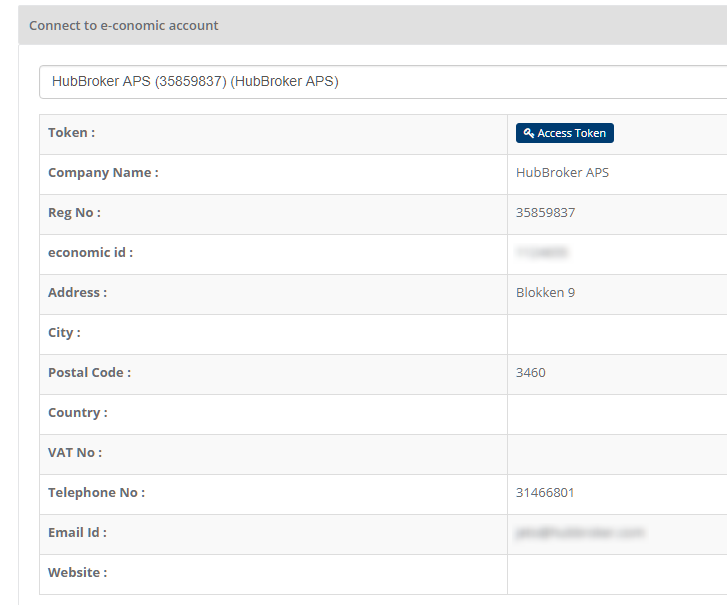
After clicking on 'Add app' it will display connected account.
After clicking on 'e-conomic account', it will be redirected to a login page or if you were already logged in then to a source with a connection to the new account.
Click on 'Import Rules' to add settings for customers for import of documents
In 'Import Rules', all the customers connected through e-conomic account will be displayed and you can activate all/specific customers for orders
After activation of customers you can change custom settings (General settings, Delivery locations settings, product settings, control document settings) for individual customer


After activation of customer it will be displayed like below (Activated customer) image:

The Import Rules feature allows users to configure customers connected through e-conomic, search customers using different criteria, customize import settings, and activate or deactivate document imports for individual or multiple customers.
Default settings for order import
The Default Settings feature allows users to define the priority order for retrieving customer details from the e-conomic account during order import, with options such as Master Sender ID, Sell-to Number, Customer Reference, and Customer Lookup, etc.

Settings to create new customer in e-conomic or reject the order when customer account (which is given in order) is not available in e-conomic

Payment Terms: Configure the payment terms applied to imported orders. You can either retrieve payment terms from the customer record in e-conomic or select a specific payment term from the available options.
Currency: Define how the currency is assigned to imported orders. You can retrieve the currency from the customer record, use the currency specified in the incoming order/invoice, or select a specific currency from the available options in e-conomic.
Shipment Methods: Configure the shipment method for imported orders. You can use the shipment method defined in the customer's e-conomic record or select a specific method from the available options.
Import Same Orders Again if Received: Control how the adaptor handles orders that have already been imported. Select Create Same Order to import the order again or Reject Order to prevent duplicate order imports.

The References section allows you to configure the source of reference information used when importing customer orders.
Setting | Description |
6(a). Other Reference / Customer Order No. | Define how the customer order number is retrieved. The selected option uses the order number from the incoming document. |
6(b). Heading | Configure the heading reference for the imported order. The current selection is None, meaning no heading source has been selected. |
6(c). Our Reference | Specify the source of the internal reference information. The selected option retrieves the default reference from the customer information. |
6(d). Our Reference 2 | Configure an additional internal reference field. The selected option also retrieves the default reference from the customer information. |

The Notes section allows you to define how additional information from incoming order documents is included in the imported order.
Setting | Description |
7(a). Text 1 | Retrieves delivery-related information from the incoming order document, such as delivery instructions or other available delivery details. |
7(b). Text 2 | Retrieves comments or additional notes from the incoming order document. |

The Discount Settings section allows users to configure the product used for discounts when processing documents in e-conomic.
Option | Description |
Select from Existing Product | Choose an existing product from e-conomic to represent discount amounts in the processed documents. |
Create New Product | Create a new product in e-conomic specifically for handling discounts when a suitable product does not already exist. |

The Delivery Location Settings allow users to retrieve and set the correct delivery address using configured lookup priorities, while providing options to accept or reject the order when no delivery address is available.

The Product Settings allow users to configure product lookup priorities using EAN, Seller Item No, or Buyer Item No, and define fallback products when a matching product is not found in e-conomic.
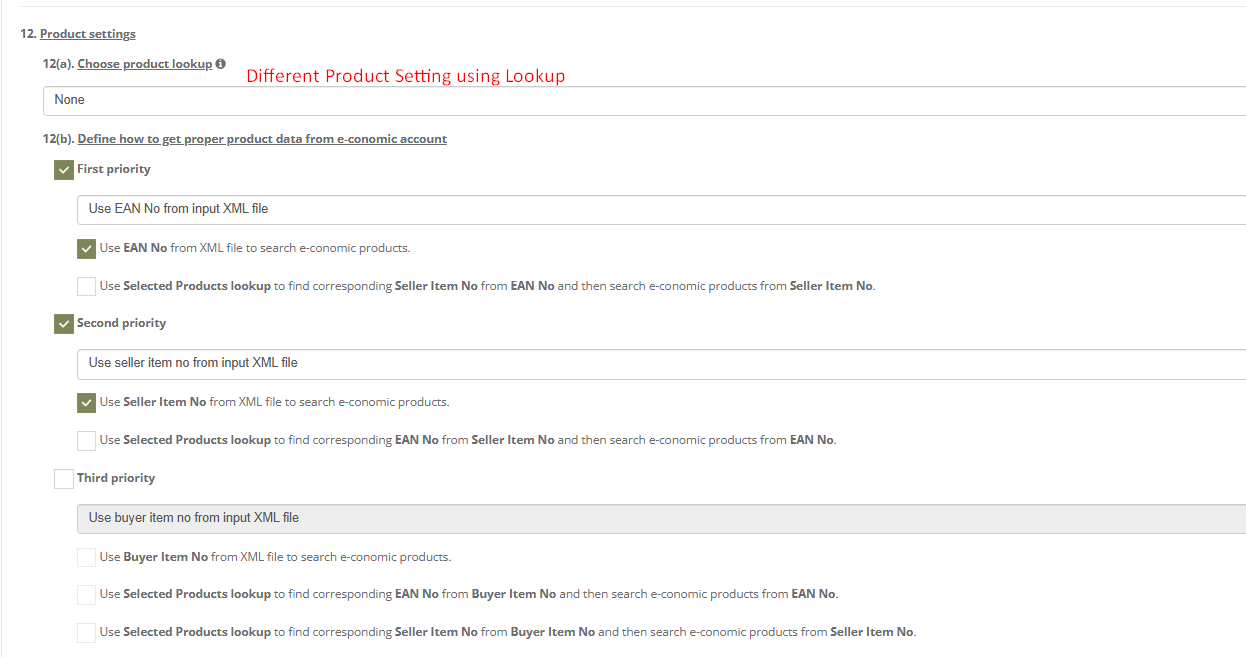
Users can also configure the product from selected from existing product for the e-conomic order line.


Users can also configure the product unit price, inventory location , and unit of measure for the e-conomic order line.
Custom settings for particular customer
You can change below settings for individual customer as per the customer requirements.
These settings allow you to customize how orders are processed for each customer.
- General Settings
- Delivery location settings
- Product Settings
- Control Document Settings


Notification settings
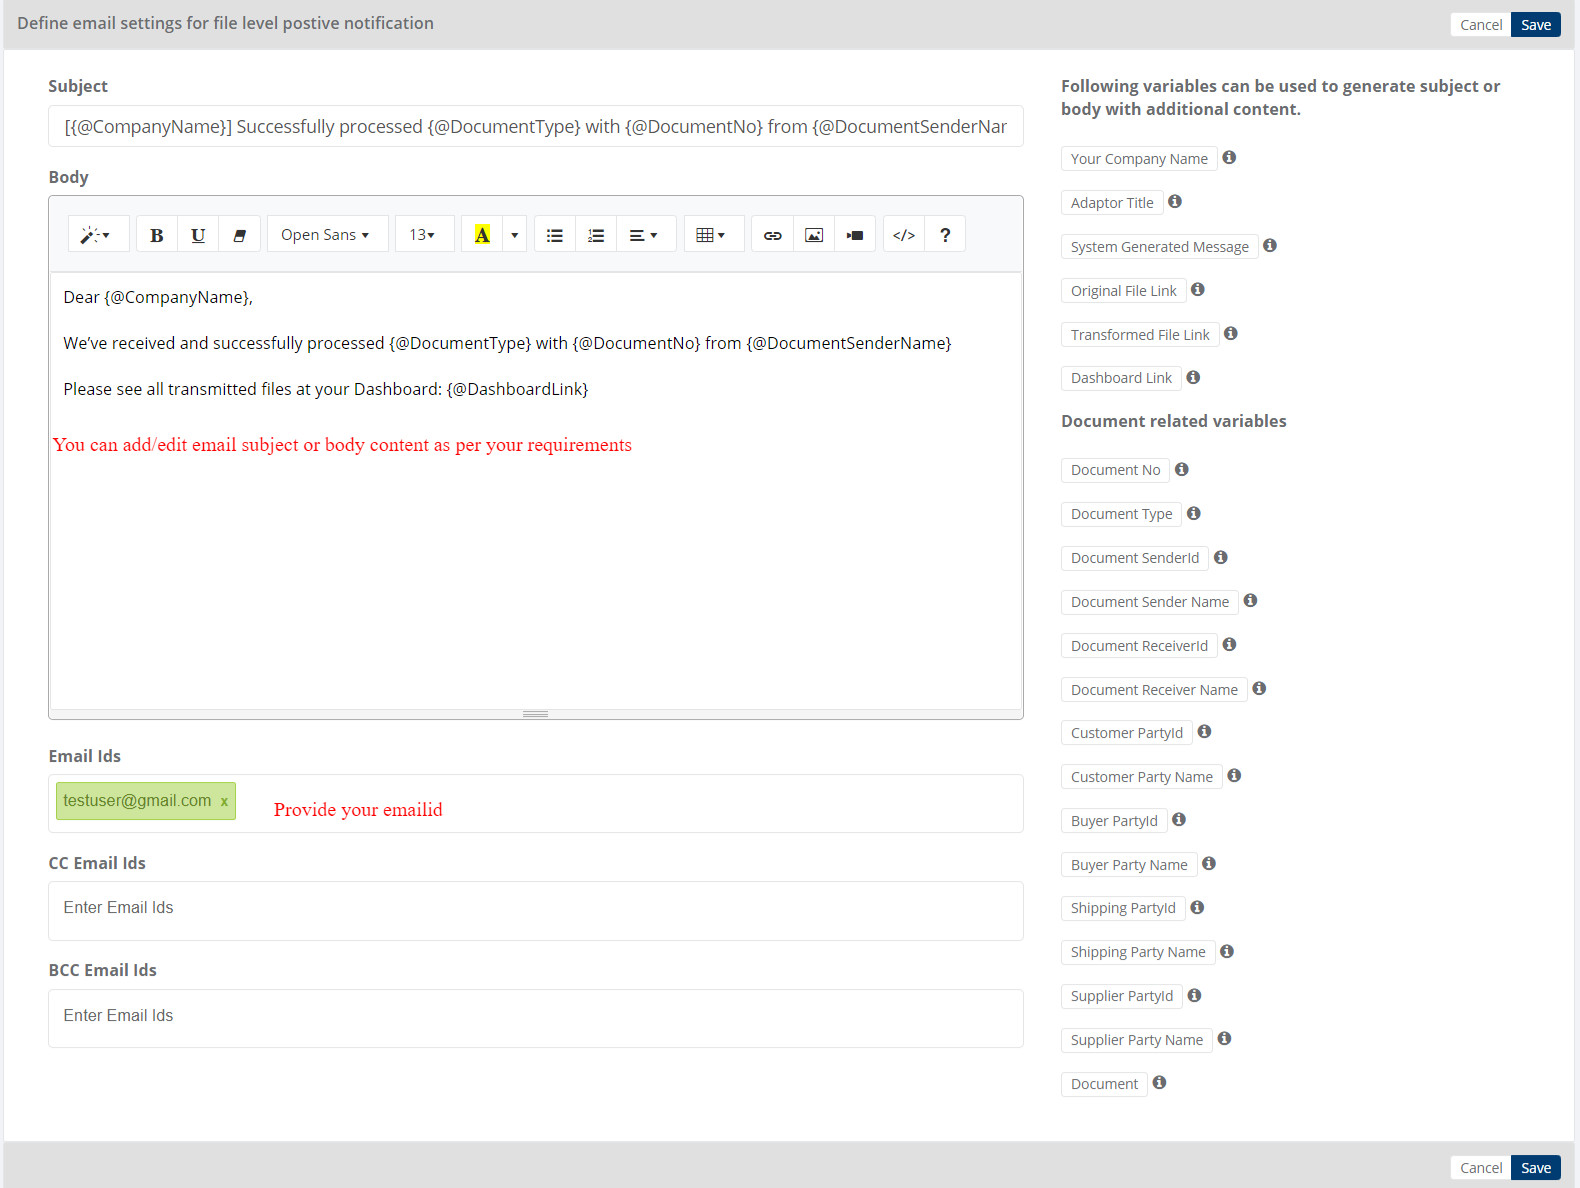
HubBroker Notification Module includes the ability to be notified on the individual steps of the transformation process, from data and / or file received at HubBroker until data and/or file leaves HubBroker’s operating environment.
- In the notification module, standard notification text can be used, or specific notification text is specified.
- In addition, small shortcuts have been developed that can be enabled in the notification message, which makes it easier for the user to navigate the HubBroker integration platform (iPaaS).
- HubBroker provide facility to send positive and negative notifications for document and adaptor level.
- User can enable/disable the notification settings according to your needs
- Document level positive notification ensures that file is processed successfully.
- Document level negative notification ensures that file is failed due to some reasons.
- Adaptor level positive notification: Enable positive notification for getting email alert when adaptor executed successfully.
- Adaptor level negative notification: Enable negative notification for getting email alert when execution of adaptor is failed.
User can set their email ids for getting positive and negative email notification.

Schedule settings
You can set schedule for Adaptor when you want to be run the Adaptor automatically
Learn more about schedule settings - Click here
Dashboard
You can view all the transactions of Adaptor through Dashboard
You can view all the details of exported documents like sender, receiver, document number, customer order number, supplier order number and status
You can view PDF and XML file of invoices which are imported and successfully processed into destination gateway


Category: Adaptor
Last date of update: 23.10.2026
Last date of update: 24.09.2018
