How to configure new adaptor?
In HubBroker Integration Platform (iPaaS), an Adaptor represents an integration process that defines how data or documents are collected from a source system, transformed according to business requirements, and delivered to a destination system.
Using an adaptor, you can configure:
- Source system or gateway from where documents are received.
- Transformation rules required for data conversion.
- Destination system or gateway where documents are delivered.
- Notification settings for successful or failed processing.
- Automatic execution schedules.
An adaptor helps you automate your business data exchange without manually transferring documents between systems.
Adaptor Configuration Flow
The adaptor configuration process contains the following steps:
- General Settings
- Source Configuration
- Transformation Configuration
- Destination Configuration
- Notification Setup
- Schedule Configuration
Create New Adaptor Options
When creating a new adaptor, you can select the required options:
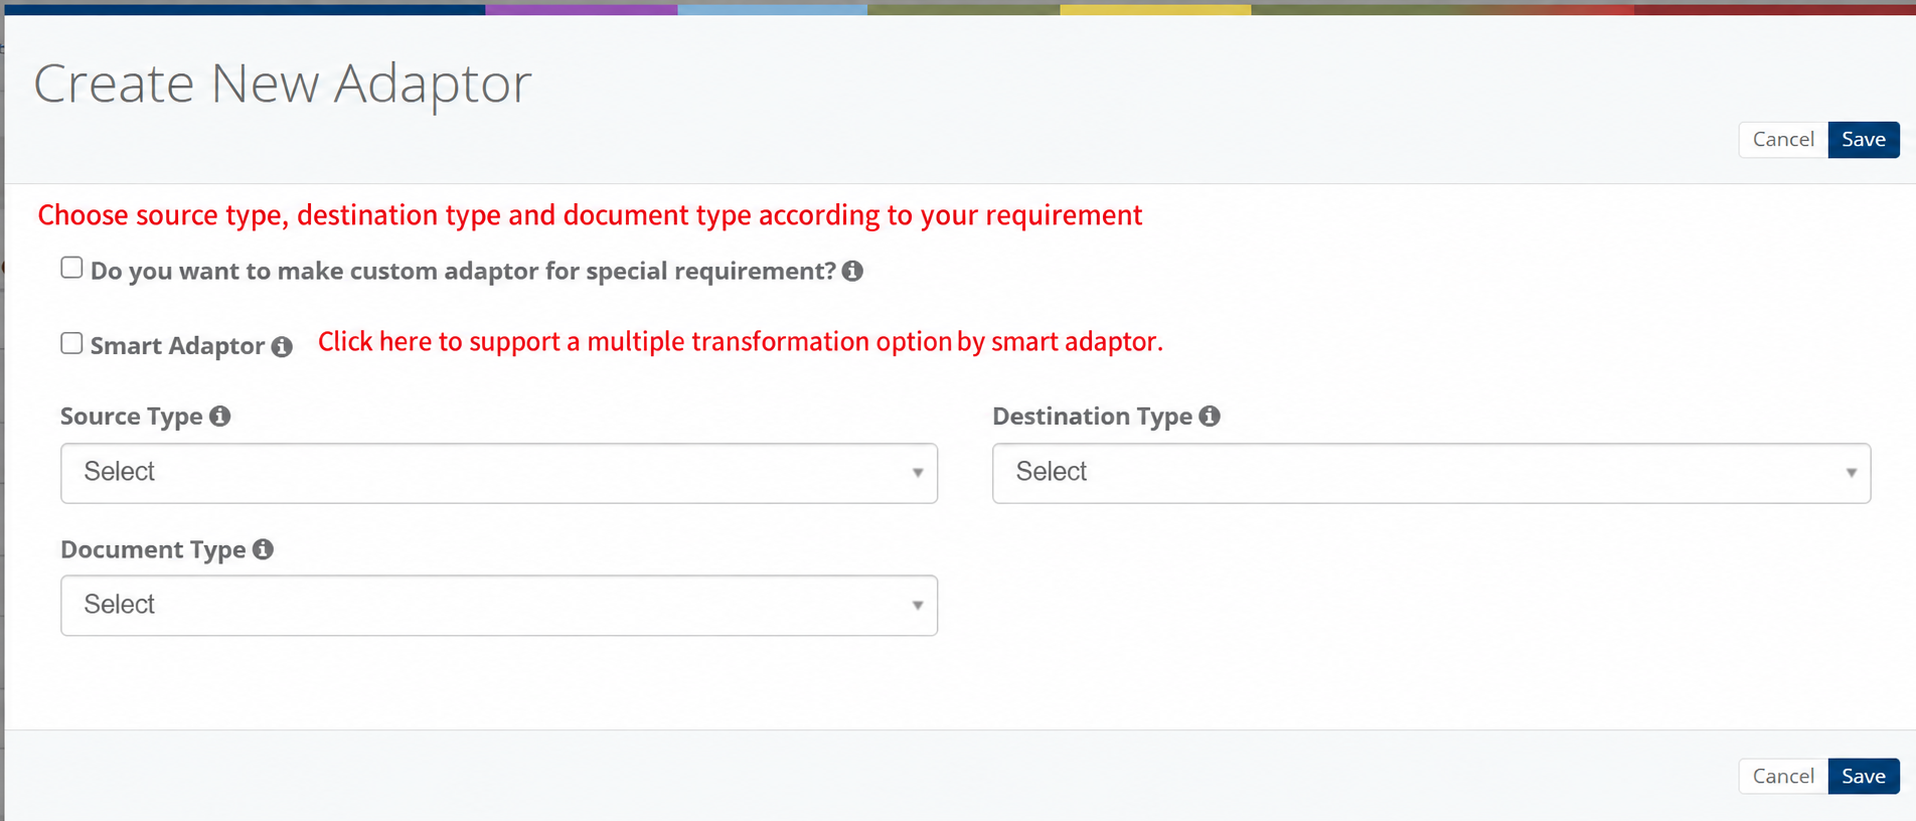
Custom Adaptor
Select this option when you need to create an adaptor for a specific business requirement that is not available in the existing adaptor catalogue.
OR
Smart Adaptor
Enable Smart Adaptor when you need to support multiple transformation options within a single adaptor.
OR
Select the Source Type, Destination Type and Document Type from the dropdown which allows the adaptor to process different document formats or transformation scenarios based on your business requirements.
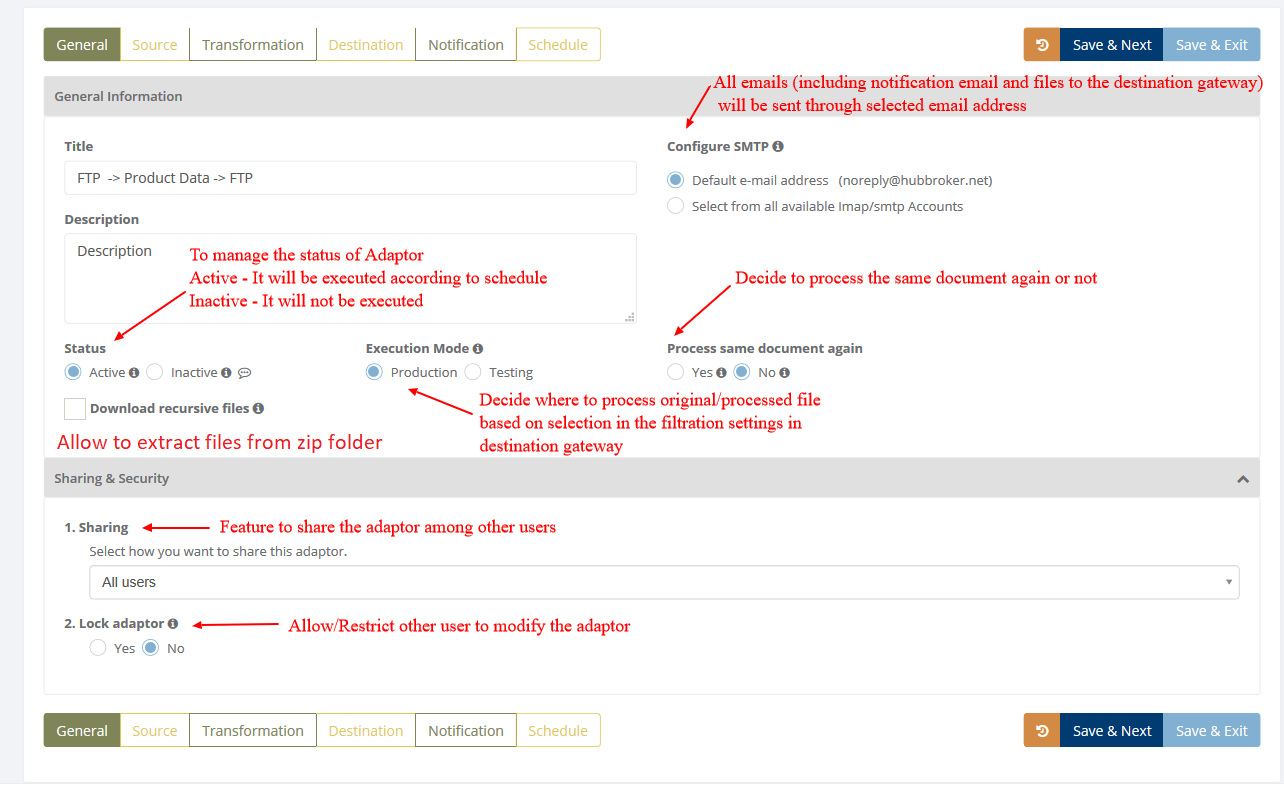
General
When user clicks on save then it will navigate to general screen of adaptor and there all the basic details for the adaptor needs to be filled up.
Learn more about sharing and security - Click here
Source
In Source you can connect any source gateway as a input for the adaptor and it will process all the documents from the source
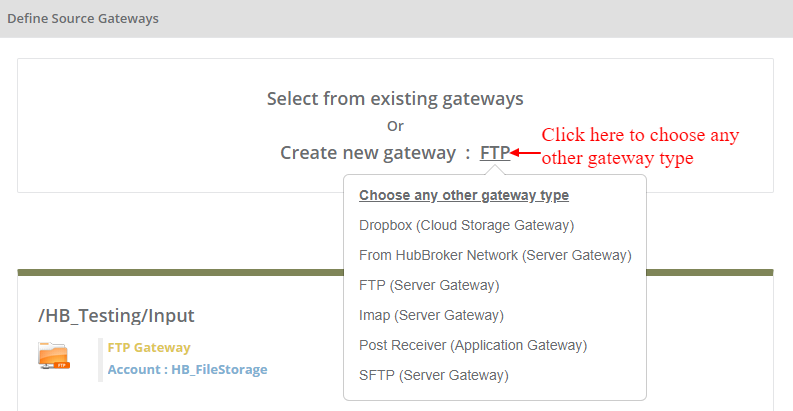
You can select any gateway from existing gateway or you can create new gateway of below different types:
- FTP
- SFTP
- Imap
- From VANS
- Post Receiver
You can select multiple gateways as a source gateway.
You can create new gateway by clicking on 'Create new gateway'

You can select any gateway as a source from existing gateways by clicking on 'Select from existing gateways', and it will display all the existing gateways and you can choose any gateway.
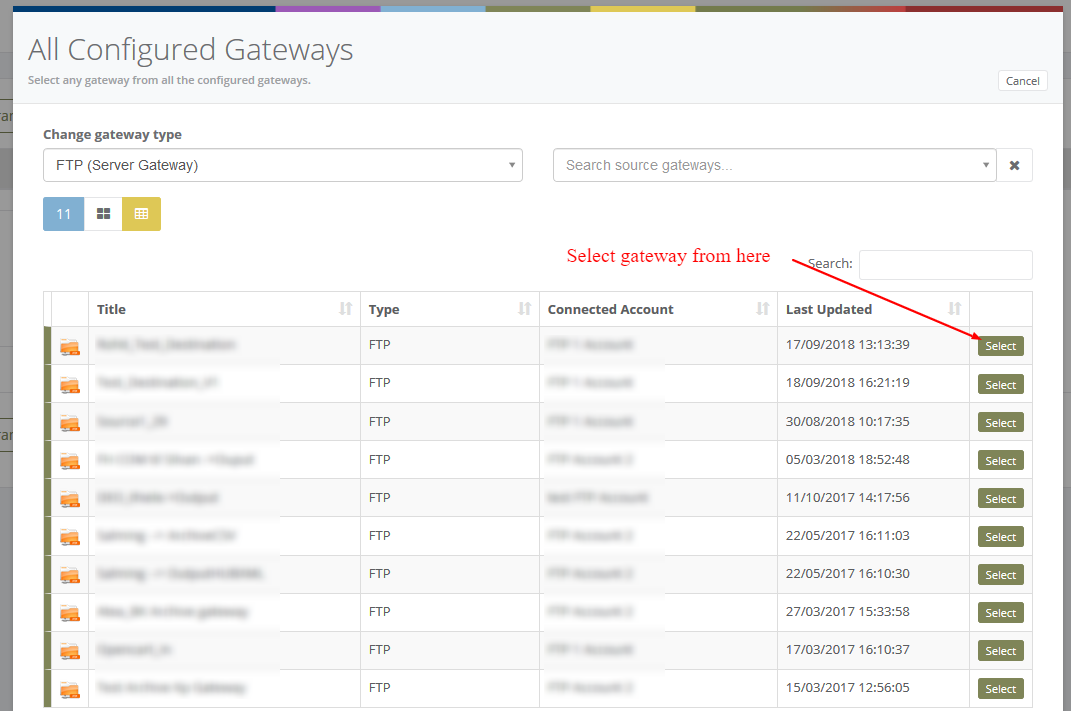
When you clicked on selected gateway type (For Ex: FTP)then below image will be displayed and you can choose any other gateway as a source for input
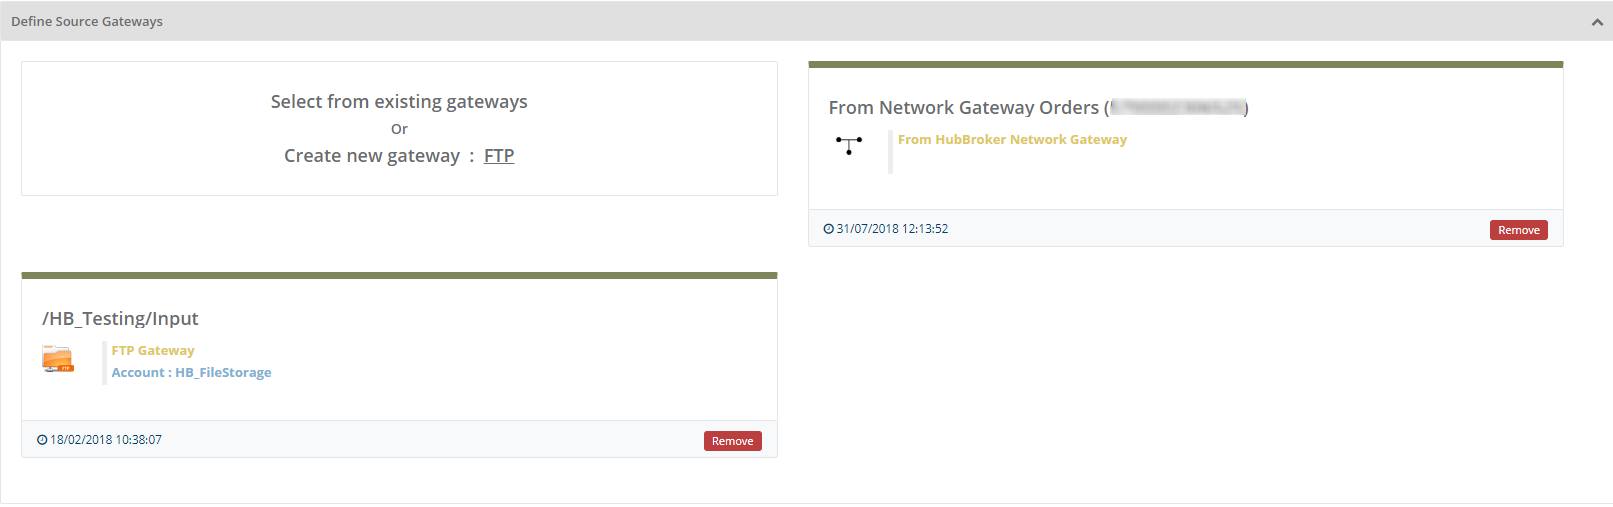
After selection of source gateway, it will be displayed like below:
Learn more about gateways - Click here
Transformation
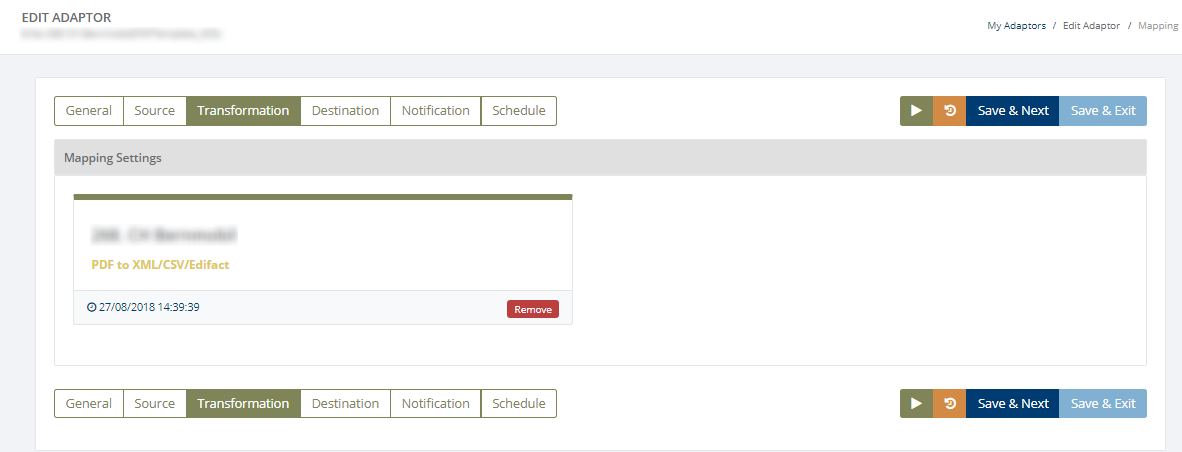
If you want to convert source file into some different format then you can use Transformation accordingly
If you want to simply route the file from source to destination then do not add any transformation, you can skip this step
How To Create a New Mapping?
- User can make different mapping according to different mapping types and can convert the documents in other format in this module
- User can create new mapping in this module according to business requirements to convert the documents in different formats
You can create new mapping in below ways:
Navigation in left menu bar -> 'New Mapping'
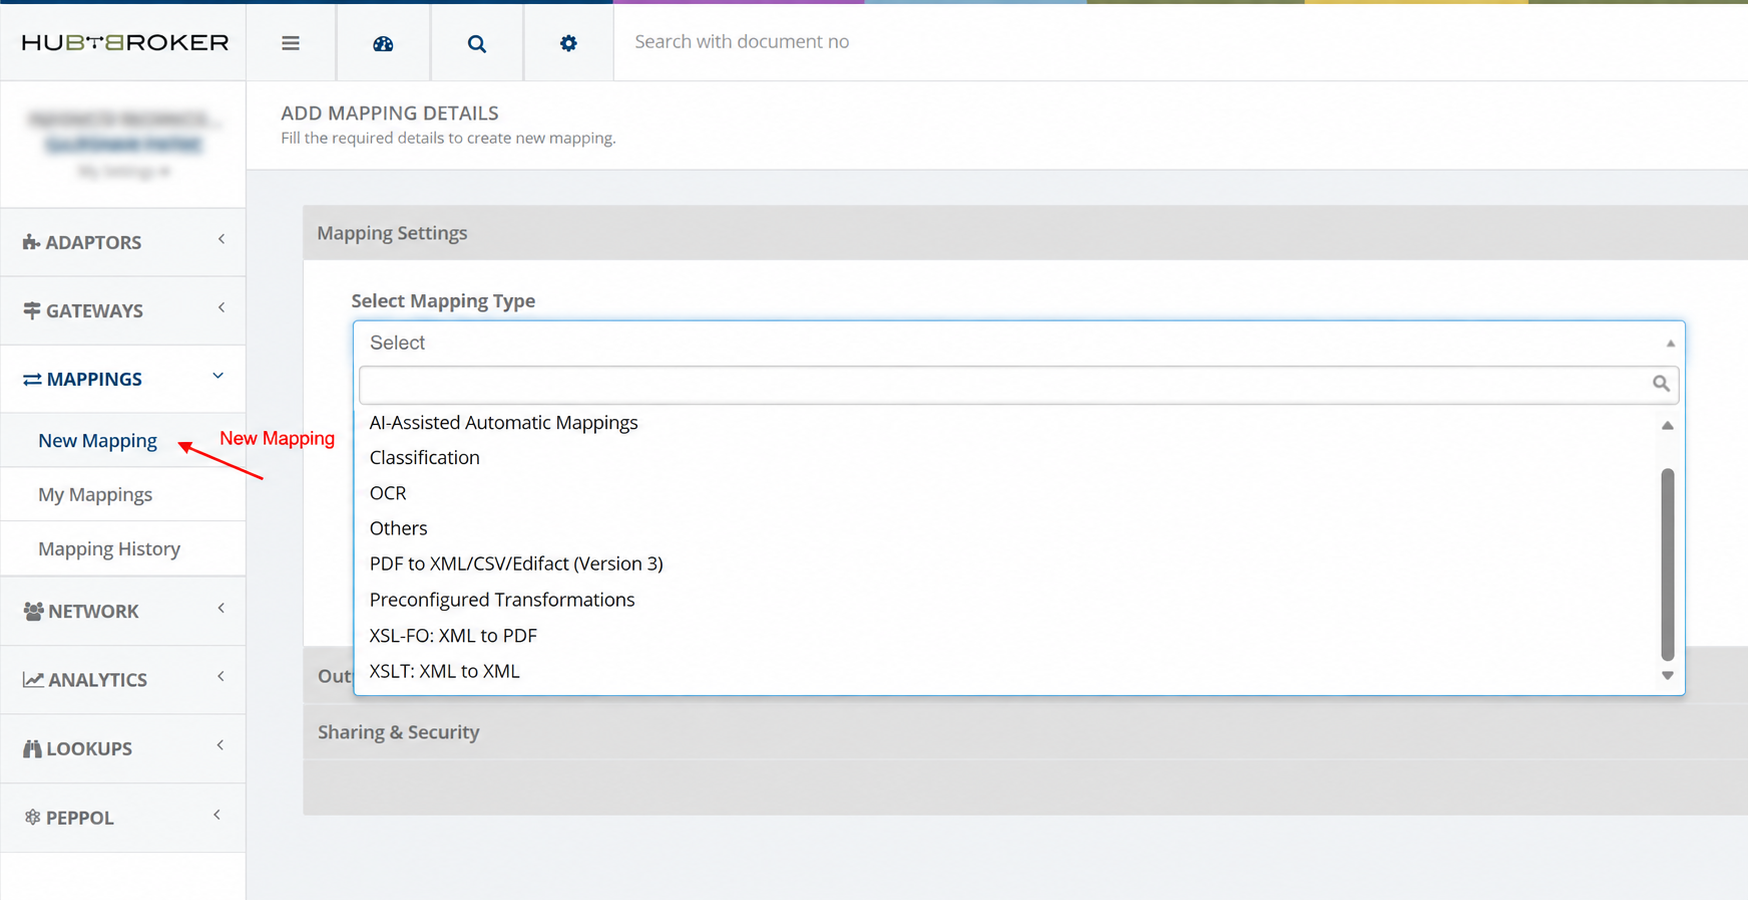
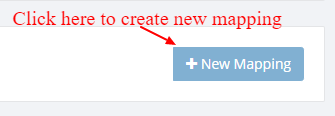
Navigation in left menu bar -> 'My Mappings' -> Click on plus button '+ New Mapping'
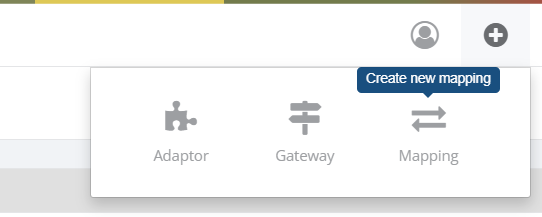
Right hand side widgets -> 'Create new mapping'
- HubBroker iPaaS provides 5 types of mappings to convert documents in other formats which are described below:
3. PDF to XML/CSV/Edifact (Deprecated)
4. Preconfigured Transformations
5. Others
6. OCR
7. PDF to XML/CSV/Edifact (Version 3)
8. AI-Assisted Automatic Mappings - It will create an automatically when the account has been activated with smart adaptor.
- iPaaS provides facility to restrict the use of mapping from other users by providing ’Sharing & Security’ module while creating new mapping
- User can choose any option in sharing like:
- All Users: Share the mapping to all the users
- Only Me: Don’t share the mapping to any user
- Specific group: Share the mapping to selected user groups
- Only admin users: Share the mapping to only admin users
- User can lock the mapping so that other users will not be able to change the mapping
Destination
In destination you can select any gateway to choose gateway as output and it will send all the files to this selected gateway
You can choose multiple destination gateway in one adaptor
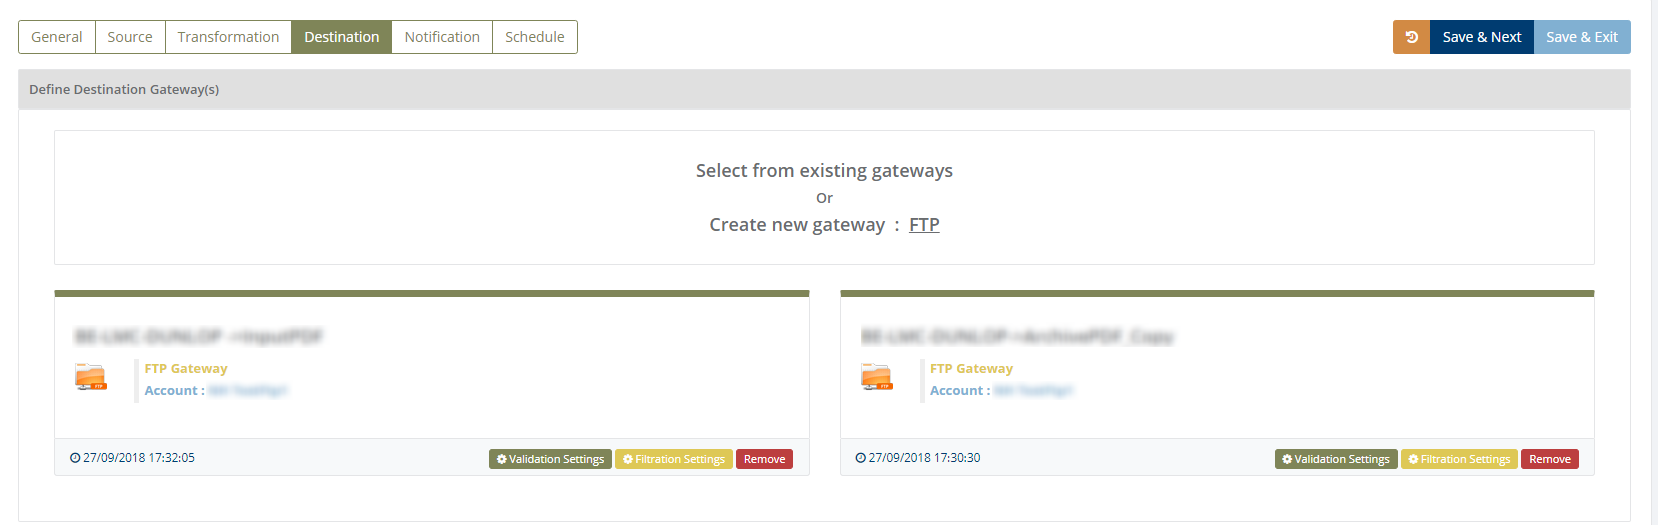
You can do validation settings and filtration settings for destination in adaptor.
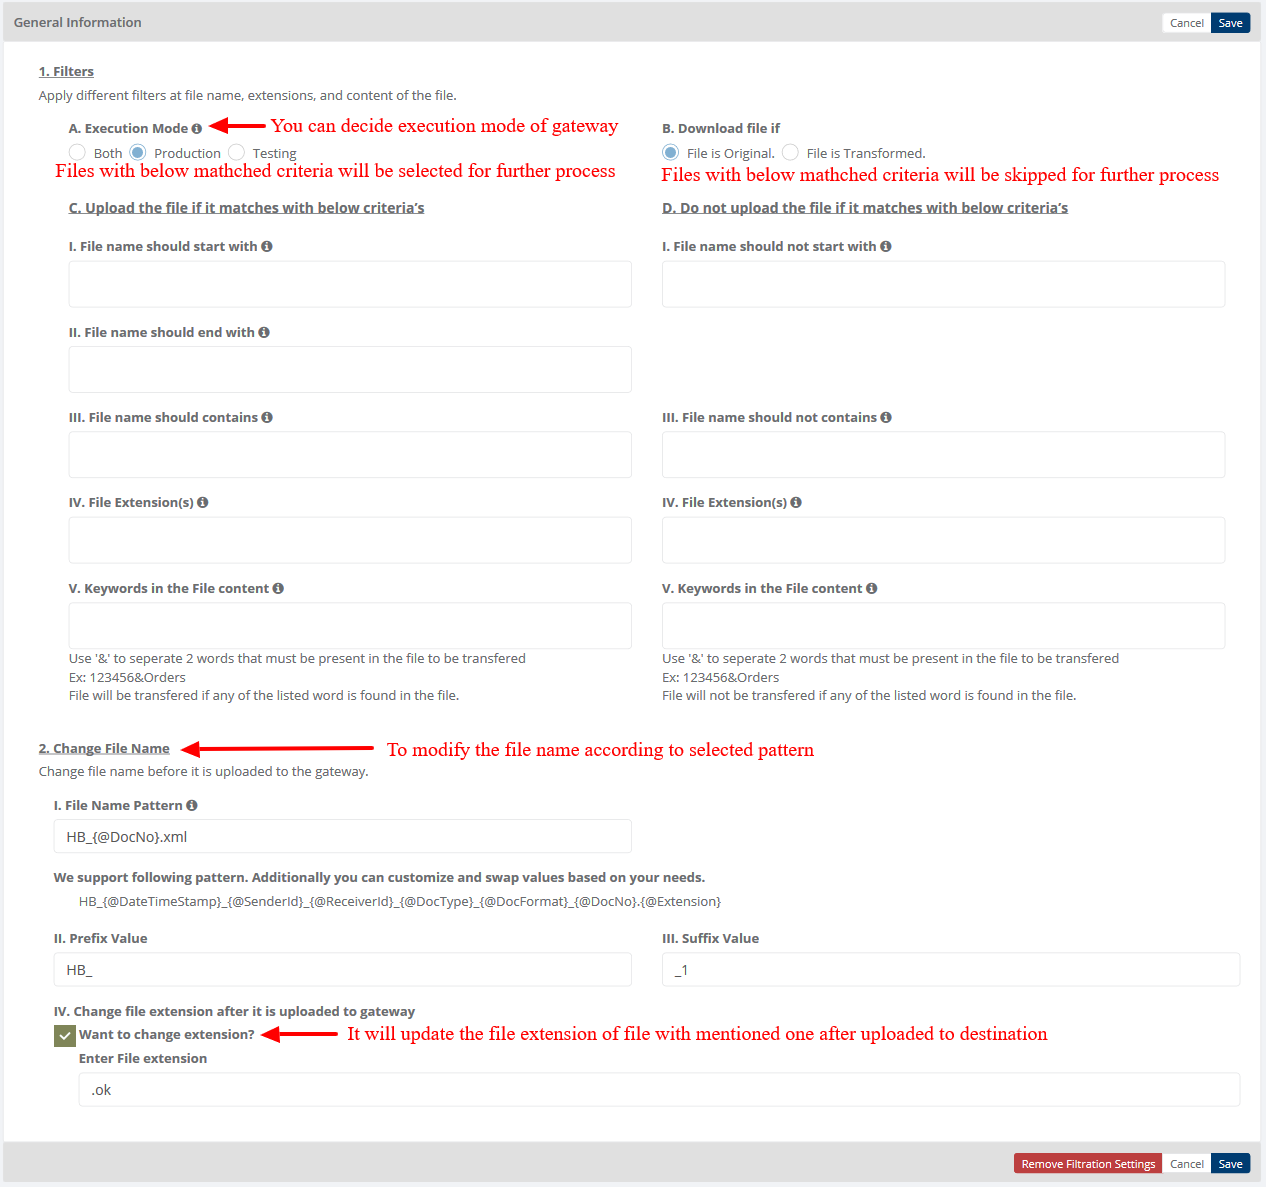
Filtration Settings
A. Execution Mode: You can decide the execution of gateway to test, production of both.
B. Download file if: Default selected option is "File is Original" because source gateway only accepts original files.
C. Download the file if it matches with below criteria’s
I. File name should start with: Transfer file if file name begins with given names (multiple file names separated by comma).
II. File name should end with: Transfer file if file name ends with given names (multiple file names separated by comma).
III. File name should contains: Transfer file if file name contains given names (multiple file names separated by comma).
IV. File extension(s): Transfer file for given file extensions (multiple file extensions separated by comma).
V. Keywords in the File content: Transfer file having given keywords (multiple keywords separated by comma).
D. Do not download the file if it matches with below criteria’s
I. File name should not start with: Do not transfer file if file name begins with given names (multiple file names separated by comma).
III. File name should not contains: Do not transfer file if file name contains given names (multiple file names separated by comma).
IV. File extension(s): Do not transfer file for given file extensions (multiple file extensions separated by comma).
V. Keywords in the File content: Do not transfer file having given keywords (multiple keywords separated by comma).
2) After transferring file:
Here user can define what will be the filename after file has been transfer to the gateway.
I. Prefix Value: User can define prefix value for file.
II. Suffix Value: User can define suffix value for file.
III. File Name Pattern: User can define file name pattern as per requirement. Default format is " HB_{@DateTimeStamp}_{@SenderId}_{@ReceiverId}_{@DocType}_{@DocFormat}_{@DocNo}.xml". User can customize and swap values based on their needs.
IV. Change file name extension after file is uploaded to destination gateway: User can define file extension so file will be uploaded to destination gateway with defined extension
Validation Settings
You can define validation settings at a source or destination gateways in adaptors.
This validation setting will be used to validate any xml document processed in adaptors. Based on the validation settings xml document will be validated against the rules defined. If xml document is not valid against the rules then It will give list of error messages which will be included inside negative notification email as validation summary.
You can set validation settings by clicking on button "Validation Settings" at source or destination gateway.
You can select existing validation settings from list or you can edit existing validation settings or create new validation settings.
You can select only one validation settings for each gateway. You can select same validation settings in all gateway.
At source gateway, if you have set validation settings the input xml document will be validated with validation rules, if the xml document is valid as per rules than it will be forwarded further for next process and if it is not validated than it will give list of error messages in negative notification.
At destination gateway, if you have set validation settings the output xml document will be validated with validation rules, if the xml document is valid as per rules than it will be uploaded to destination gateway and if it is not validated than it will give list of error messages in negative notification.
You can configure below validations for document:
- Document
- EndpointId
- Supplier
- Customer
- Billing
- Delivery
- Total
- Line
- Payment
You can go deep in below validations step by step.
Document
You can select which fields should be checked while xml document processed through adaptors.
When you want to validate file against structure/schema select option "Check Structure/Schema Validation".
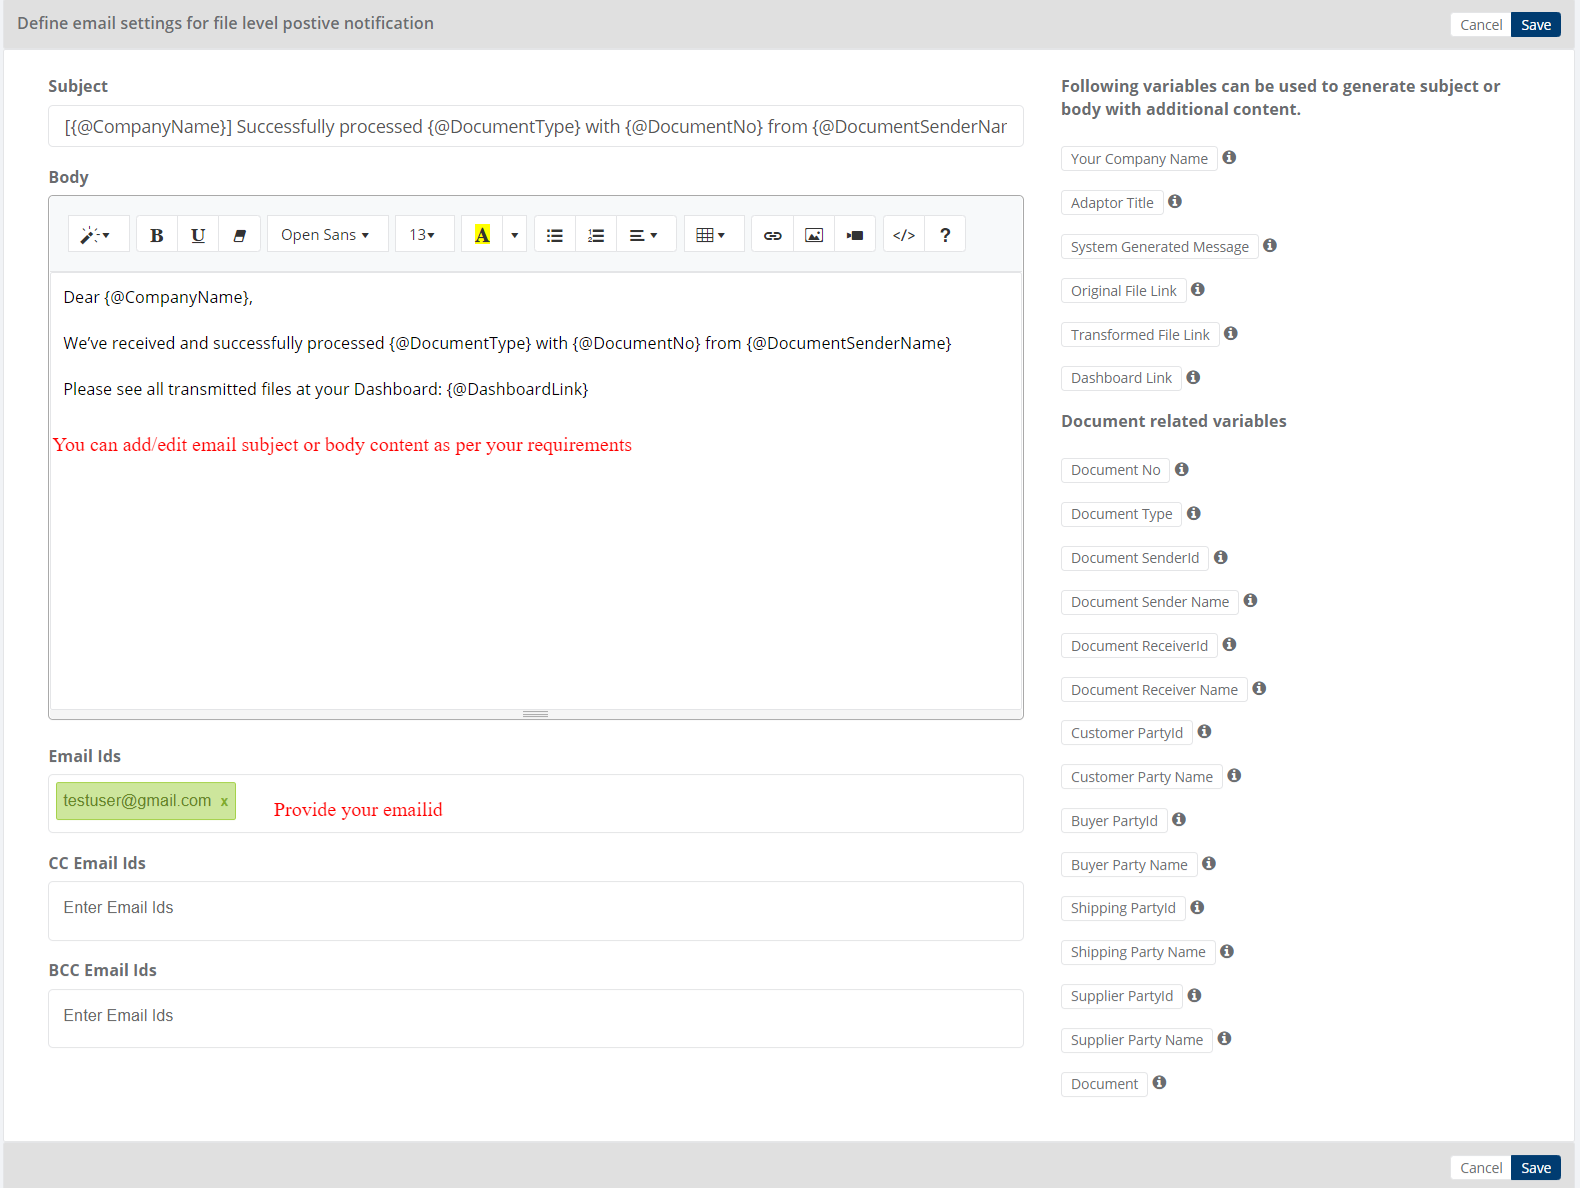
Notification
HubBroker Notification Module includes the ability to be notified on the individual steps of the transformation process, from data and / or file received at HubBroker until data and/or file leaves HubBroker’s operating environment.
- In the notification module, standard notification text can be used, or specific notification text is specified.
- In addition, small shortcuts have been developed that can be enabled in the notification message, which makes it easier for the user to navigate the HubBroker integration platform (iPaaS).
- HubBroker provide facility to send positive and negative notifications for document and adaptor level.
- User can enable/disable the notification settings according to your needs
- Document level positive notification ensures that file is processed successfully.
- Document level negative notification ensures that file is failed due to some reasons.
- Adaptor level positive notification ensures that all files processed successfully.
- Adaptor level negative notification ensures that some of the file is not processed due to some business rule.
User can set their email ids for getting positive and negative email notification.
Schedule settings
The Schedule tab controls when the adaptor should execute automatically.
Configure a schedule when the adaptor should process documents automatically according to a defined time or recurrence.
Learn more about schedule settings - Click here
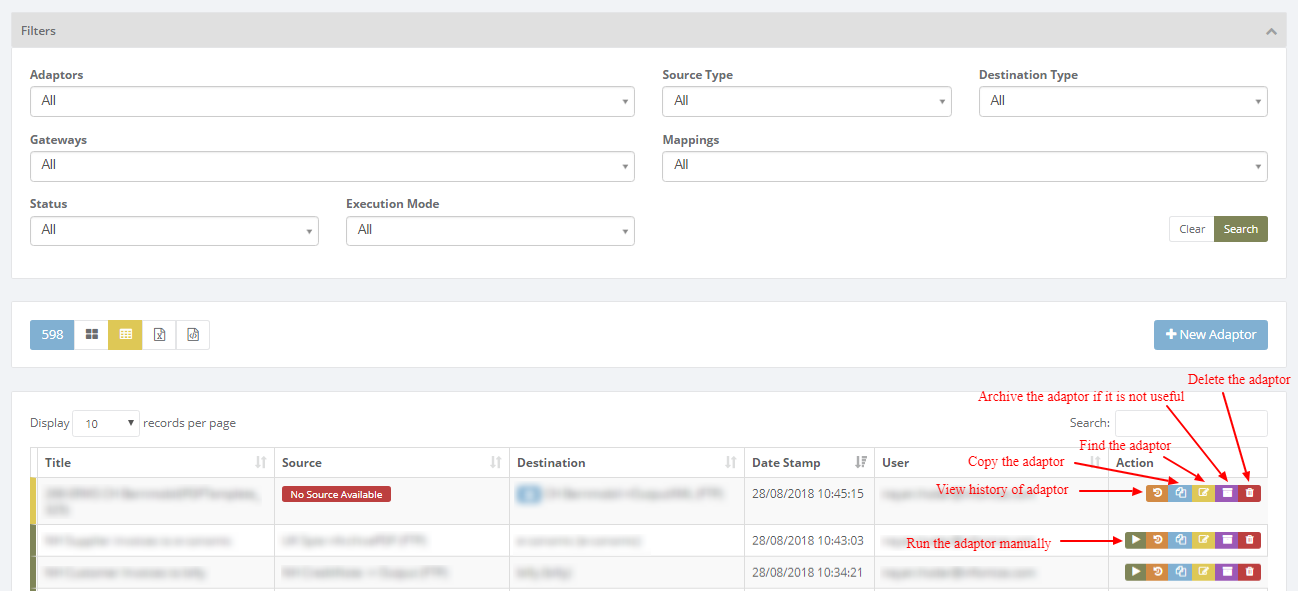
My Adaptors
The My Adaptors page provides an overview of the adaptors configured in your account. Use the filters at the top to find an adaptor by source, destination, gateway, mapping, status, or execution mode. The action buttons beside each adaptor allow you to perform operations such as manual execution, viewing history, copying, archiving, or deleting the adaptor.
Category: Adaptor
Last date of update: 01.10.2026
