How to connect Amazon account with iPaaS?

This page explains the step-by-step process to connect your Amazon Seller Central account with HubBroker iPaaS.
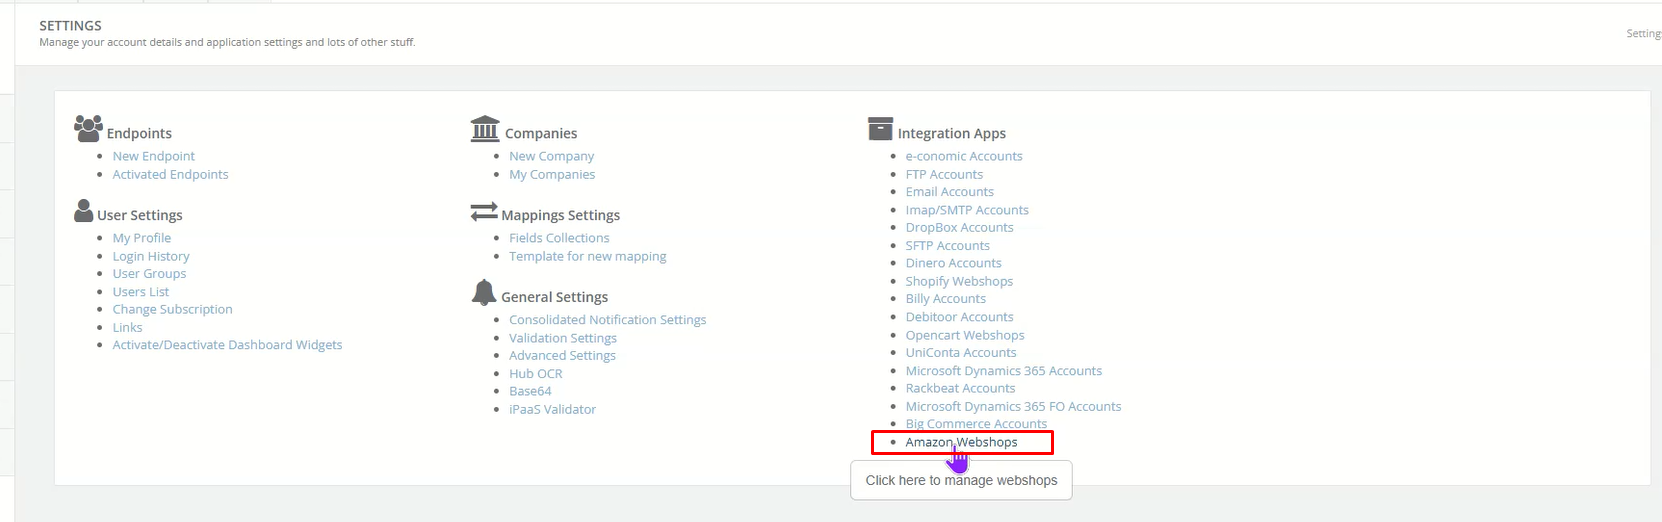
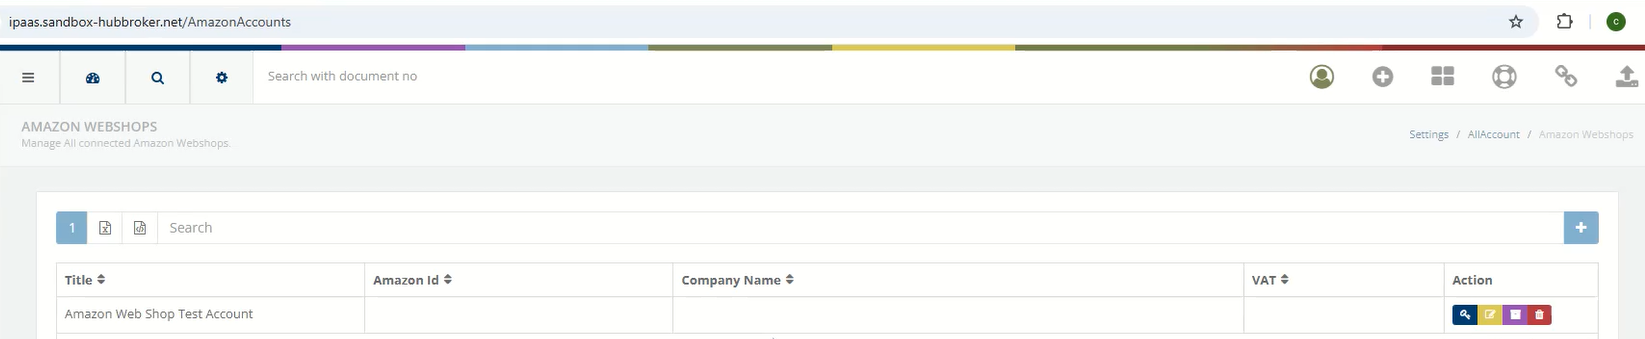
Step 1: Navigate to Amazon Webshops
- Go to Settings
- Under Integration Apps, click on Amazon Webshops
- Click on Add Webshop
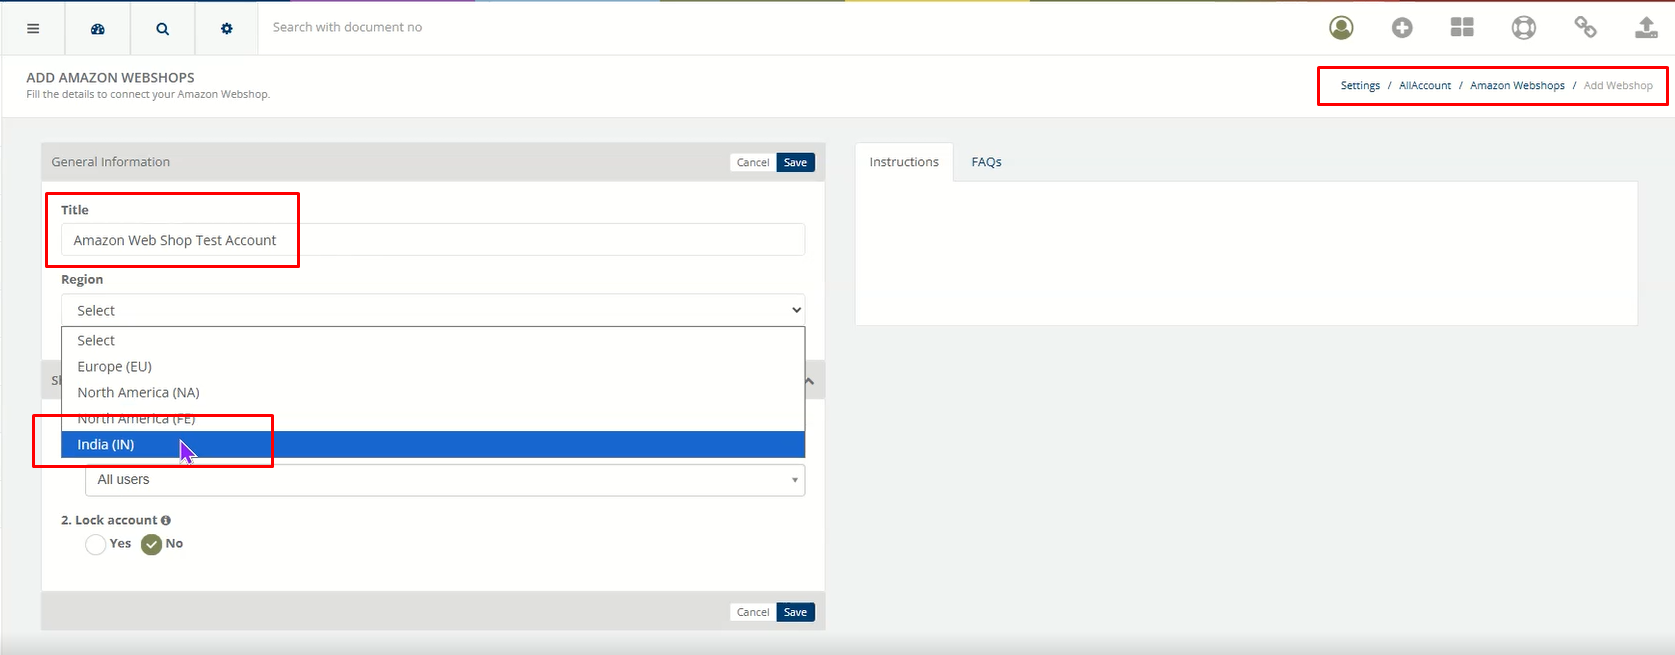
Step 2: Enter Webshop Details
1. Fill in the required information:
- Title (e.g., Amazon Web Shop Test Account)
- Region (e.g., India (IN), EU, NA, etc.)
- Other configuration fields as required
2 Click on the Save button
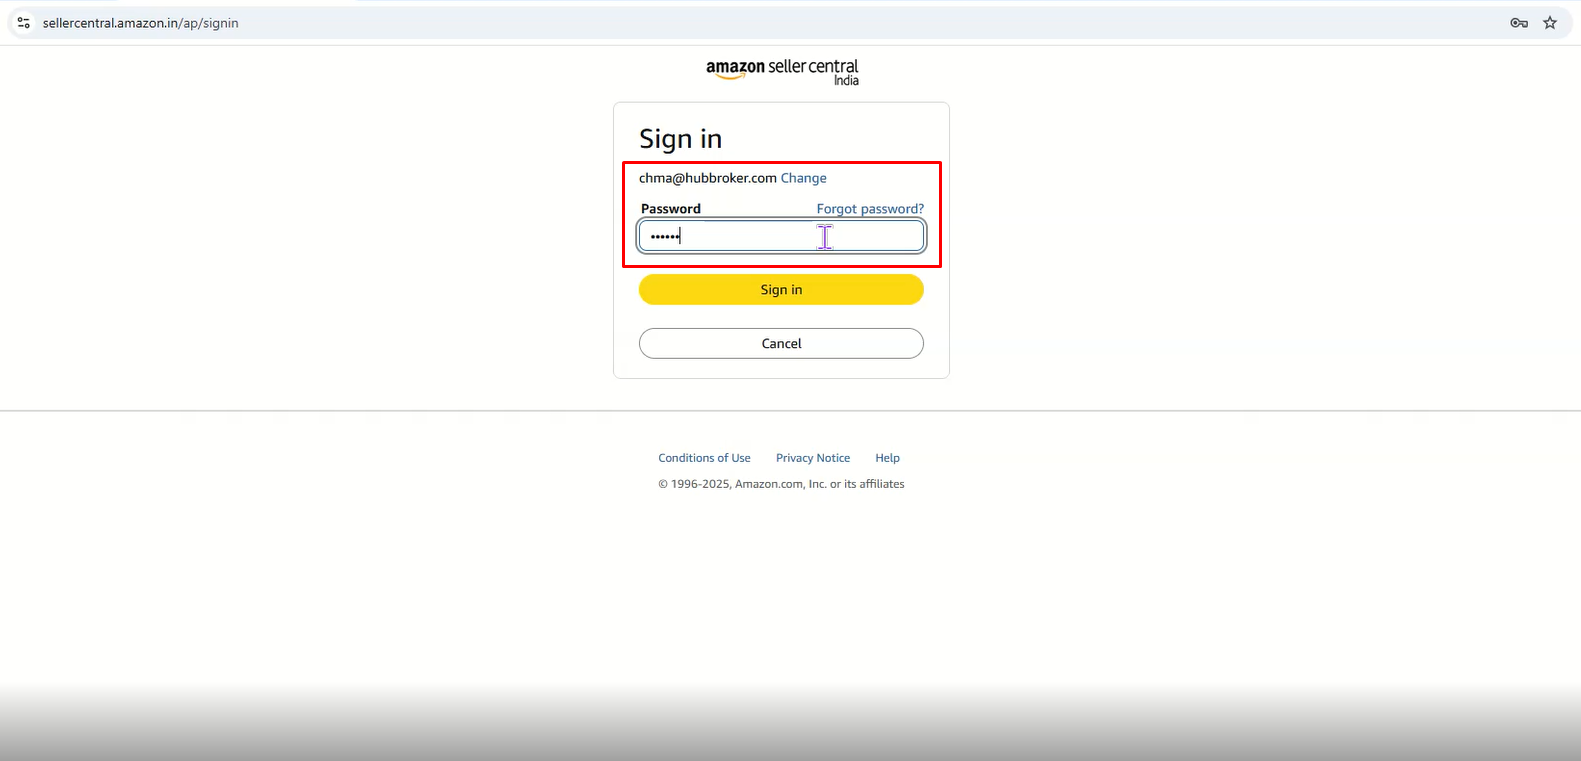
After clicking Save, you will be automatically redirected to the Amazon Seller Central login page to authorize the connection.
Step 3 : Login to Amazon Seller Central
- Enter your Amazon Seller Central credentials
- Complete OTP / Two-Factor Authentication (2FA) if required
- Proceed with the login
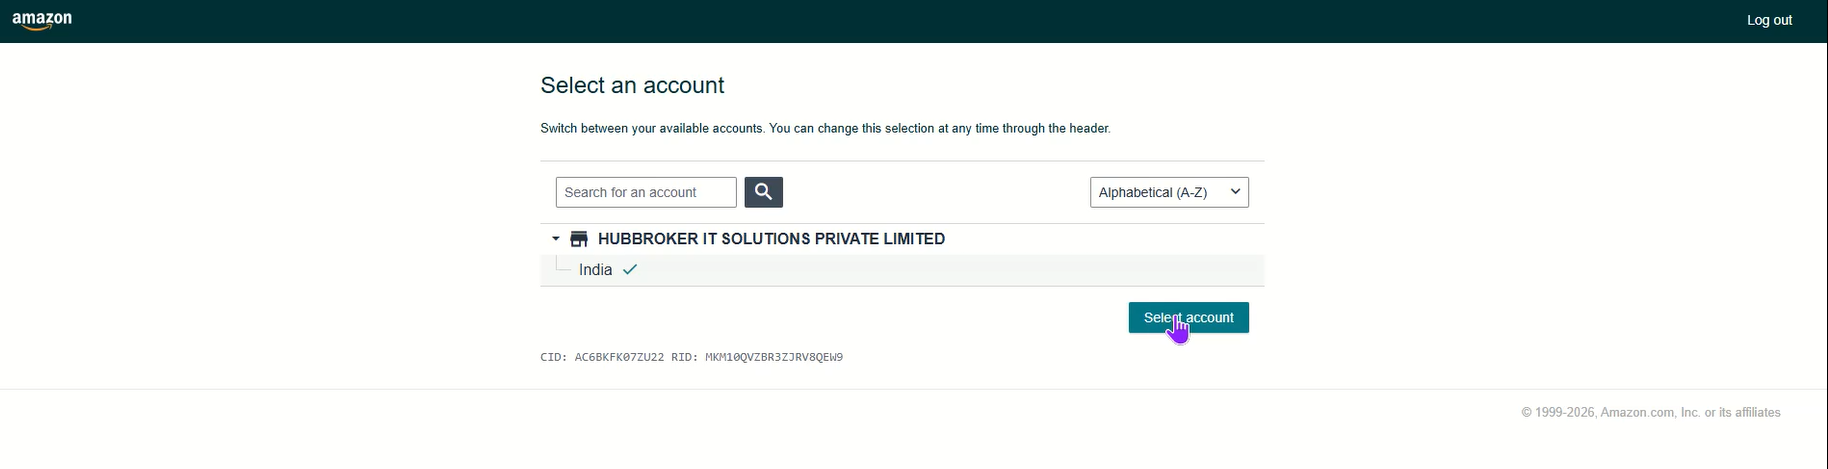
Once authentication is successful, you will be redirected to the Account Selection page.
Step 4: Select Amazon Account and Approve Access
- Choose the appropriate seller account
- Click on Select Account
- Accept the required Terms and Conditions
- Approve access for HubBroker iPaaS
After approval, your Amazon account will be successfully connected to iPaaS.
Confirmation
Once the connection is completed:
The Amazon Webshop will appear in the Amazon Webshops list
The integration will be ready for data synchronization
Notes
- Ensure you are using valid Seller Central credentials.
- Make sure the correct region is selected during configuration.
- If authorization fails, verify OTP or account permissions.
- Only users with appropriate Amazon permissions can approve access.
Category: API Integration Documents
Last Updated: 10.02.2026