Peppol Onboarding Resources

Updated by Jens Toke Lausen

Peppol Onboarding Resources | HubBroker iPaaS
Peppol Access Point HubBroker Logo
Start Here: Are You Registered for Peppol?
+
Who Should Complete This Registration?
This step applies to:
  • New users visiting from our website
  • Users who have not yet registered on Peppol
  • Existing HubBroker users activating Peppol for the first time
Step 2 — Submit the Form & Receive OTP
Once you click Sign Up, an OTP will be sent to your registered email.
OTP Input Screen
Step 3 — Auto Verification & Popup
If all details are valid, a popup will appear: “Peppol Auto Participate Created Successfully.”
Choose “Yes, update it”.
Step 4 — Redirect to Dashboard
You will be redirected to your HubBroker's Peppol Dashboard automatically.
Important Note:
Once a company is registered with one email + registration number, the same combination cannot be used again.
Step 1
Login to HubBroker iPaaS
Use credentials from your welcome email
Open the iPaaS login page and sign in.
iPaaS Dashboard screenshot

Screenshot: Peppol Participants list

Step 2
Go to Peppol → Participants
From the left-side navigation, scroll down to Peppol and click Participants.
Peppol Participants list screenshot
Step 3
View Your Registered Participant
The participants table shows your registered Peppol entry and its status.
  • Name — registered company name
  • Participant Identifier — GLN / EAN / VAT
  • SMK / Directory Status — active/inactive
  • Action — Edit (yellow), Delete (Only for HubBroker Admin User)
Participant row screenshot
Step 4
Open & Review Participant Details (Edit)
Click the yellow Edit button to open the participant edit screen. Confirm registration, metadata and document profiles.

Registration Details

  • Environment — Production or SMK (test)
  • Active in SMK — ON means test environment active
  • Active in Peppol — ON means production/peppol directory active
  • ISO Identifier — country-specific scheme (e.g., DK:CVR)
  • Routing Endpoint ID — HubBroker internal endpoint
  • Verification badge — green = verified
Edit Registration screenshot

Business Card (Peppol Metadata)

  • Company name, country, language, address
  • Website & remarks (optional)
Business card / metadata screenshot

Document Configuration

Enable the required document types (Invoice, Order, Credit Note, ASN, Catalogue). Buttons indicate Add / Added status.

Document types screenshot

Activation Checklist

  • Active in Peppol = ✔
  • Directory Status = ✔
  • Identifier Verified = ✔
  • Required Document Types Added
Sending Documents (Outbound Peppol)
+
Step A
Locate Your Peppol Sender Auto Adaptor
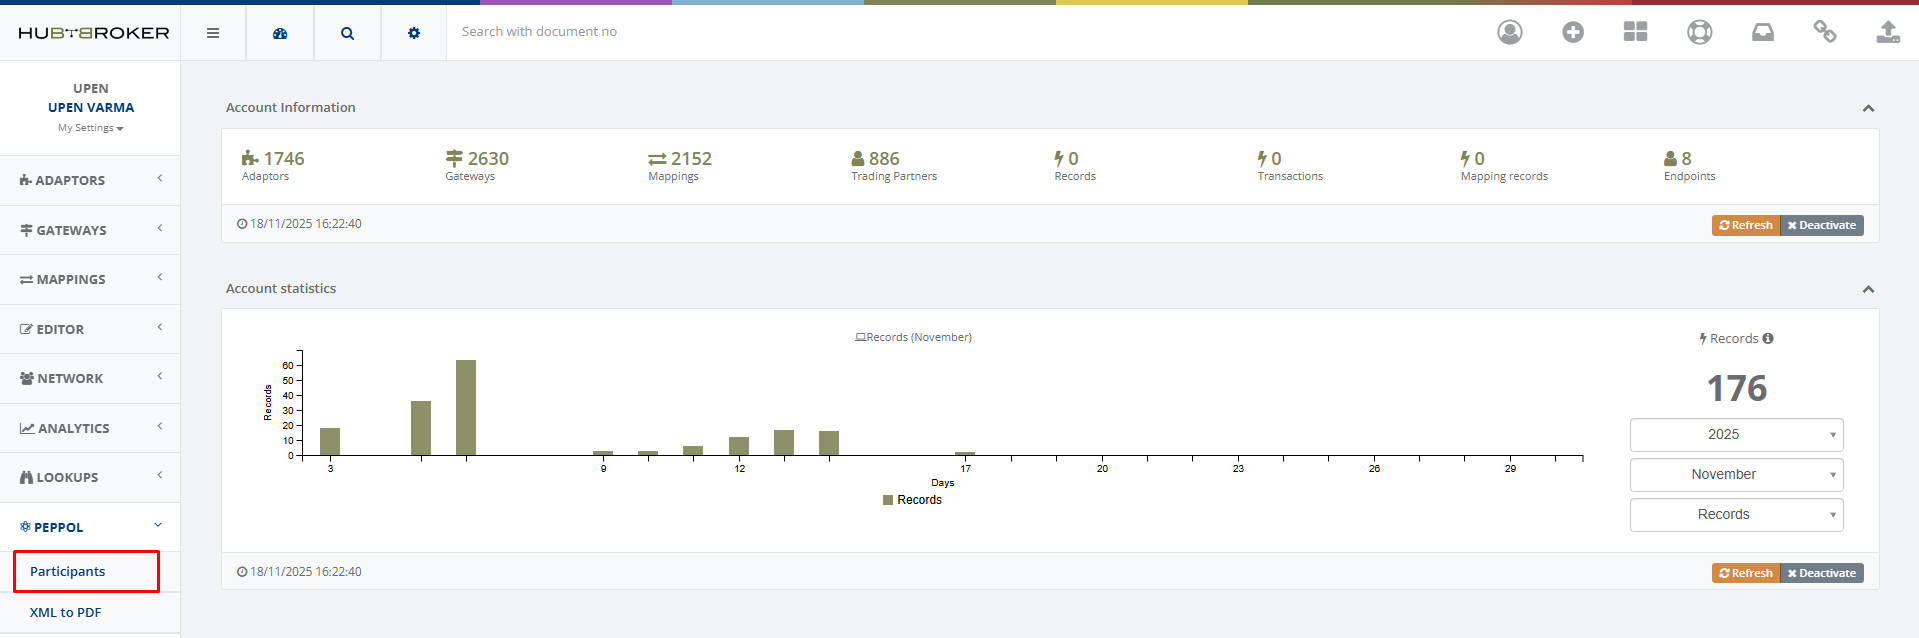
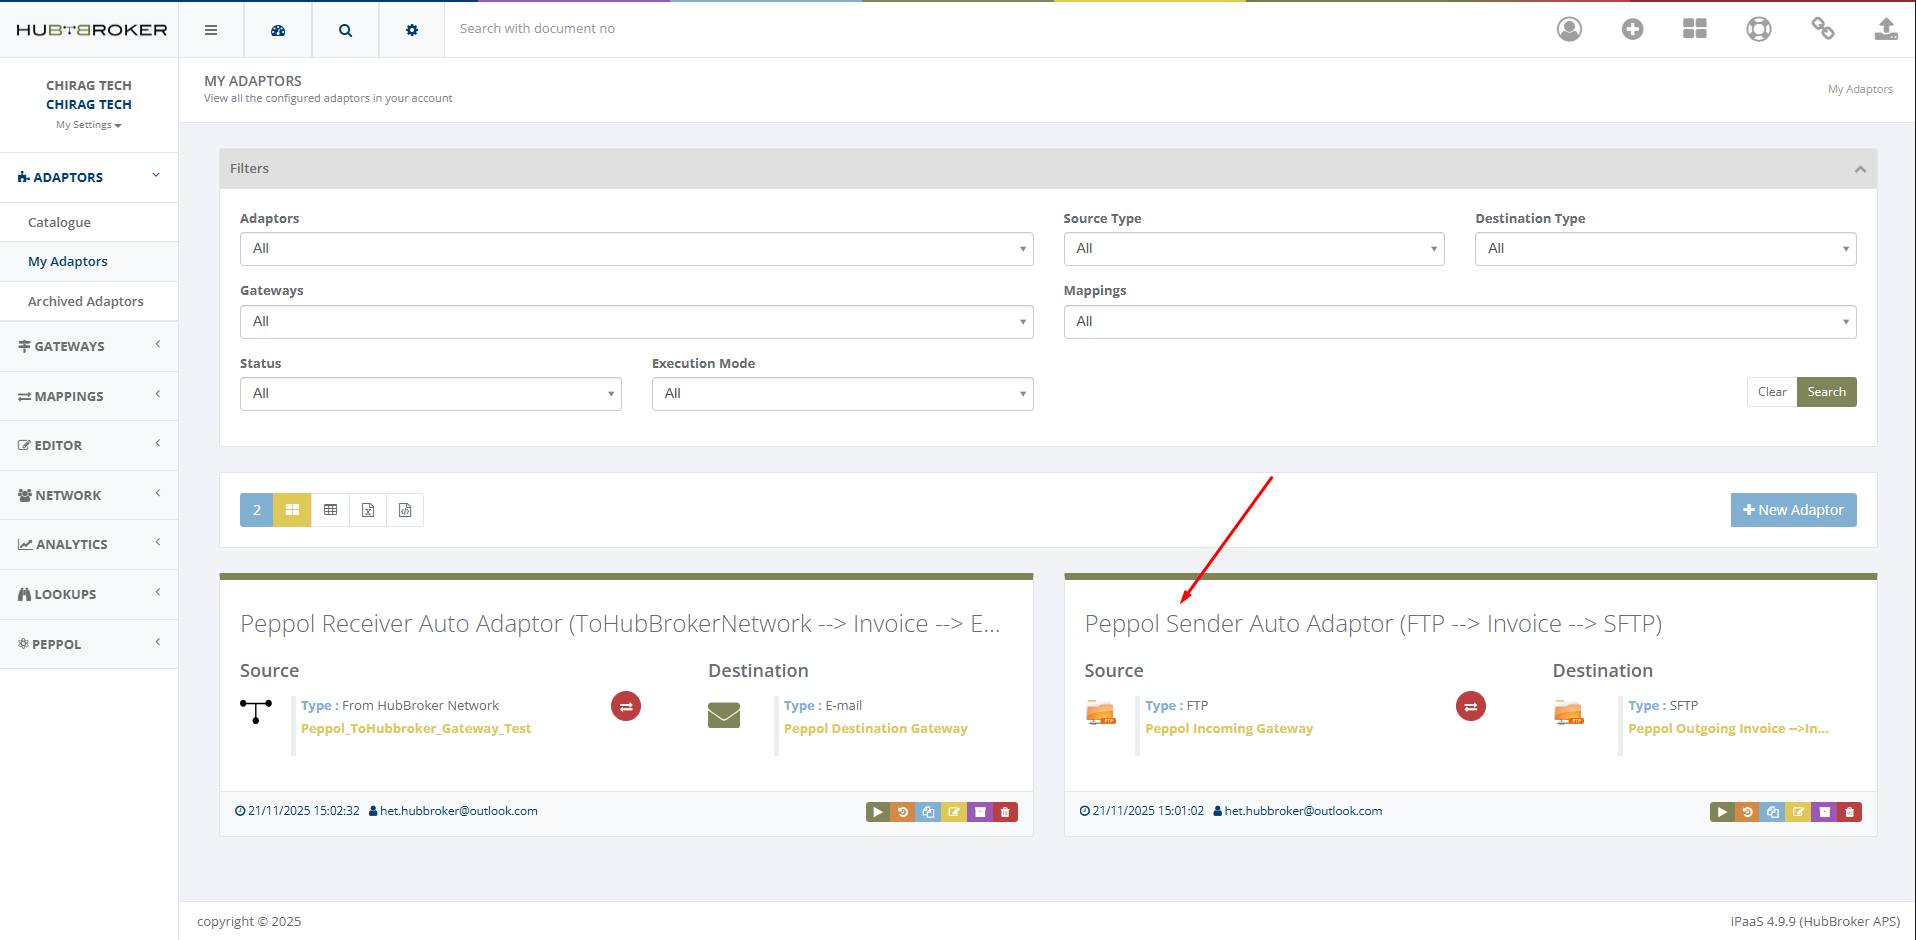
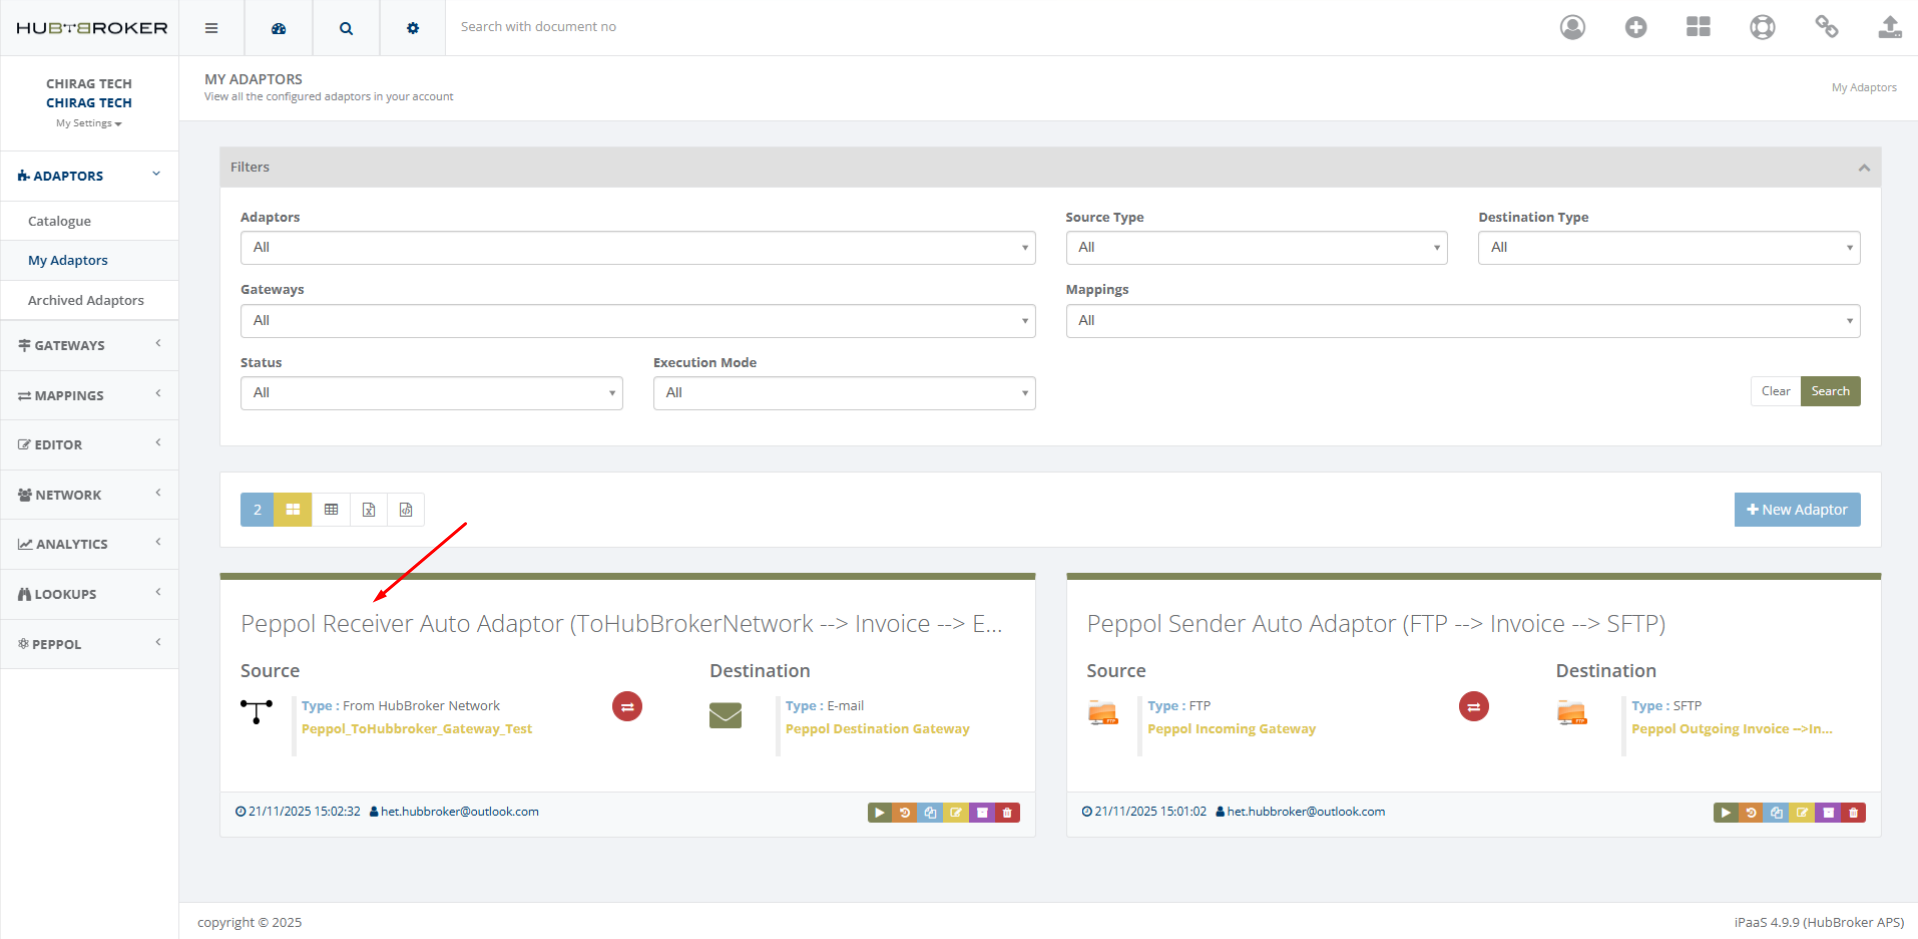
To begin sending Peppol documents, first identify your outbound flow. Go to Adaptors → My Adaptors and look for:

Peppol Sender Auto Adaptor

This adaptor is responsible for sending your outbound documents (Invoices, Credit Notes, etc.) to the Peppol Network. It typically appears as:
Peppol Sender Auto Adaptor (FTP → Invoice → SFTP / Peppol)
Peppol Sender Adaptor page
Step B
Understand the Outbound Flow
Your outbound Peppol delivery follows a simple and automated structure:
  • Source: Usually FTP by default (HubBroker standard routing).
  • Destination: HubBroker’s Peppol Gateway, where validation and delivery occur.
Important:
When this adaptor is auto-generated, no mapping is shown, as standard Peppol XML files are sent directly. If you require format conversion such as:

PDF → Peppol XML
CSV / Excel / ERP format → Peppol XML

please contact HubBroker for custom mapping setup.
Step C
Uploading Your Peppol Documents
You can submit outbound Peppol files in two ways:
  • Automatic upload — your ERP exports files directly to the FTP source.
  • Manual upload — upload a file to the source folder using the Upload button (shown below).
After upload, the adaptor will automatically:
  • Validate the file (BIS schema & Peppol rules)
  • Convert it to Peppol XML if custom mapping is configured
  • Send the file through HubBroker’s Access Point
  • Track delivery and response from the receiver’s AP
Peppol Sender Adaptor page
Step D
Adaptor Buttons & Their Purpose
The adaptor tile includes the following action buttons:
  • Green — Execute: Triggers the sending process immediately.
  • Orange — Transactions: View full outbound history and file-level logs.
  • Blue — Edit: Visible only for HubBroker users.
  • Red — Delete: Visible only for HubBroker users.
Step E
Check Outbound Delivery Status
Go to Reports → Outbound Logs to view the complete Peppol delivery lifecycle:

Uploaded → Validated → Sent → Delivered → Done

If a document fails, the log will display the exact validation or delivery error reported by the receiving Access Point.
Note
Important Information
  • This is HubBroker’s default routing service for Peppol outbound flows.
  • If you want to change the source (FTP → Email, SFTP, API), please contact HubBroker.
  • If you require file conversion, mapping, or custom Peppol transformation, HubBroker will assist.
Receiving Documents (Inbound Peppol)
+
Step A
How Peppol Inbound Delivery Works
When another company sends you a document (Invoice, Order, etc.) through Peppol, it is first delivered to HubBroker’s Access Point on your behalf. From here, the document is validated, verified for compliance and prepared for delivery to your ERP or chosen destination.

Next → Let’s see where these documents appear in your HubBroker portal.
Step B
View Your Received Documents (Peppol Receiver Adaptor)
Every incoming Peppol document sent by your vendors arrives in your Peppol Receiver Auto Adaptor. This adaptor is responsible for:

✔ Receiving Peppol XML documents
✔ Validating the files
✔ Routing them to your ERP / Email / FTP / API

To view it, go to:
Adaptors → My Adaptors and locate:
Peppol Receiver Auto Adaptor
Peppol Receiver adaptor page
Step C
Understanding the Receiver Flow
Once a file reaches HubBroker, it goes through the following automated flow:
  • 1. Peppol Network → HubBroker Access Point
  • 2. Validation (BIS rules, mandatory fields, SMP checks)
  • 3. Routing to your configured destination
  • 4. Delivery into your ERP / Email / FTP / API
HubBroker manages all compliance, technical checks, and invoice formatting during this step.
Step D
Delivery to Your ERP or Destination
After validation, HubBroker automatically delivers each Peppol document to your configured destination:
  • Your ERP (Dynamics, SAP, E-conomic, Uniconta, etc.)
  • Email inbox
  • FTP / SFTP location
  • REST API endpoint
No manual action is required — delivery is fully automated.
Step E
Monitor Processing Status (Inbound Logs)
Track all incoming Peppol documents under:

Reports → Inbound Logs

You will typically see statuses like:
Received → Processed → Delivered

Any validation errors (missing fields, invalid values, SMP failure) will also appear here.
Inbound logs screen
Note
Important Information
  • This is HubBroker’s default routing service for receiving Peppol documents.
  • Mapping is not required for standard Peppol XML inbound delivery.
  • Custom conversions (e.g., Peppol XML → ERP format) can be enabled on request.
  • To change your destination (ERP, Email, FTP, API), please contact HubBroker.
Monitoring & Status Tracking
+
Info
Status Flows (Outbound)
Typical outbound flow: Uploaded → Validated → Sent → Delivered → Done
Info
Status Flows (Inbound)
Inbound flow: Received → Processed → Delivered to ERP
Where
Where to Check
Use Reports → Logs for both inbound and outbound messages and filtering by date, type or status.
Troubleshooting & Common Errors
+
Error
Participant Not Found
If you see this, verify the participant ID and directory publication. Check SMP metadata and contact support if needed.
Error
BIS Validation Error
Open the detailed validation message in Logs, fix the missing/invalid field in your ERP mapping, then resend.
Tip
Resend Guidance
You can resend from adaptor history or by reprocessing the invoice from your ERP. Always check timestamps and Application Response (AR).

❓ Frequently Asked Questions

Where can I find my Peppol ID?
Open Peppol → Participants → Edit. The Participant Identifier (GLN/EAN/VAT) is shown in the details view.
How do I check if my document was delivered?
Go to Reports → Outbound Logs and check the message status: Delivered / Done indicates success.
Where do supplier documents appear?
Supplier documents appear in Reports → Inbound Logs and are processed by adaptors to your ERP.
How can I resend a rejected document?
Fix the error in your ERP mapping and resend via the adaptor history or re-upload the document.
Who do I contact for support?
Email support@hubbroker.net or use the support link in iPaaS.
Zoom preview


How did we do?